Jump to content


Photo

Peugeot 404C - the restoration thread


  • Please log in to reply
60 replies to this topic

#1 404KF2

404KF2
  • Member

  • 19,131 posts
  • Joined: October 99

Posted 24 February 2019 - 21:26

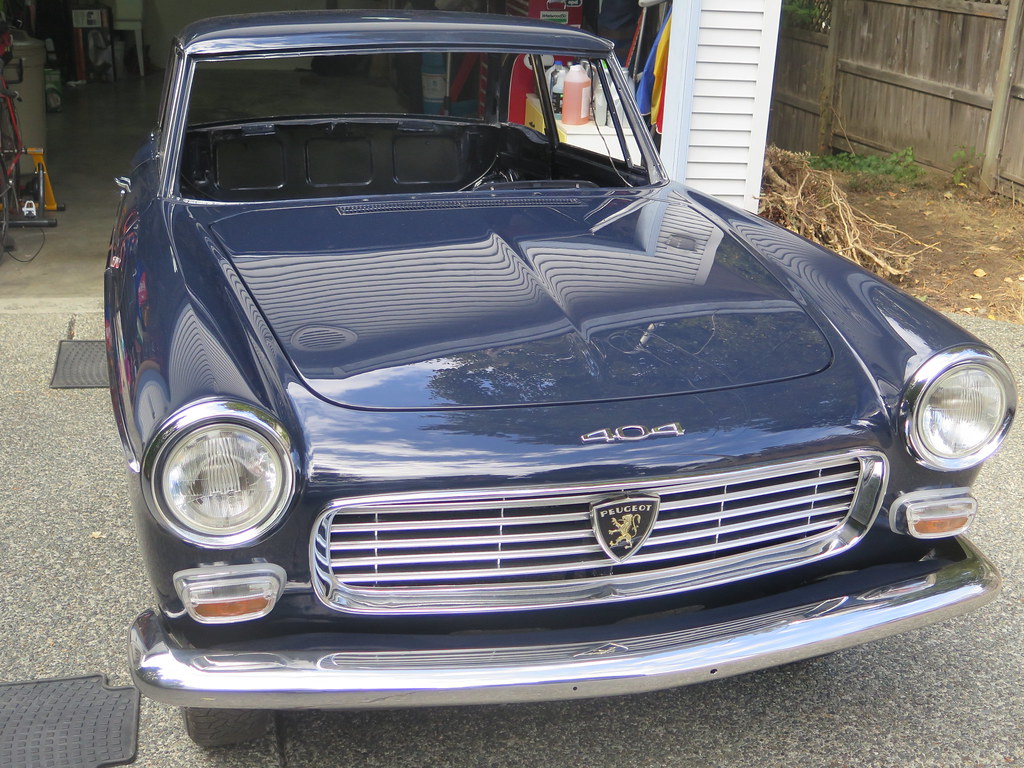
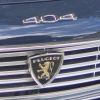
Apologies if it's not directly motorsports related - though the sedan derivative did win the East African Safari four times.


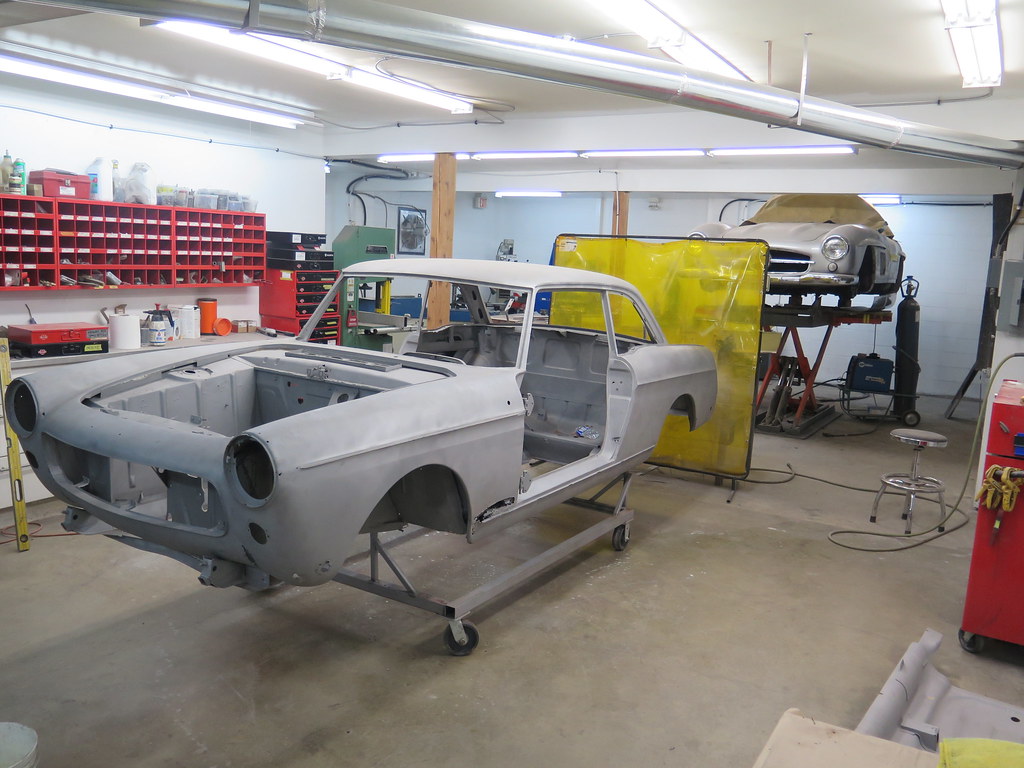
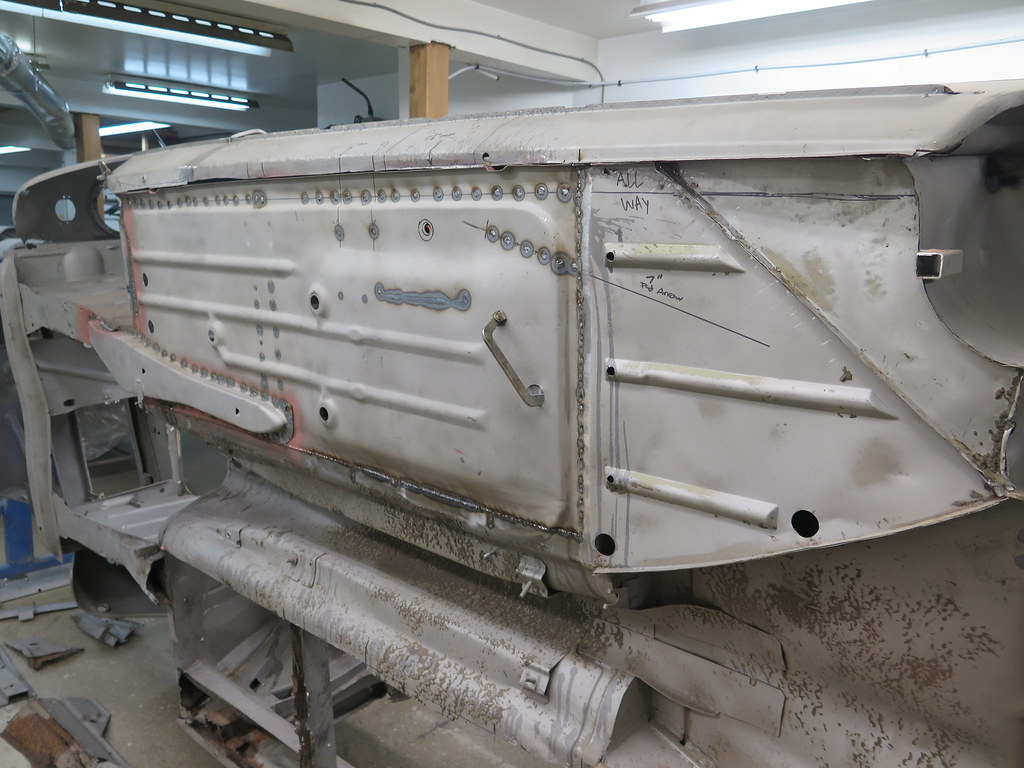
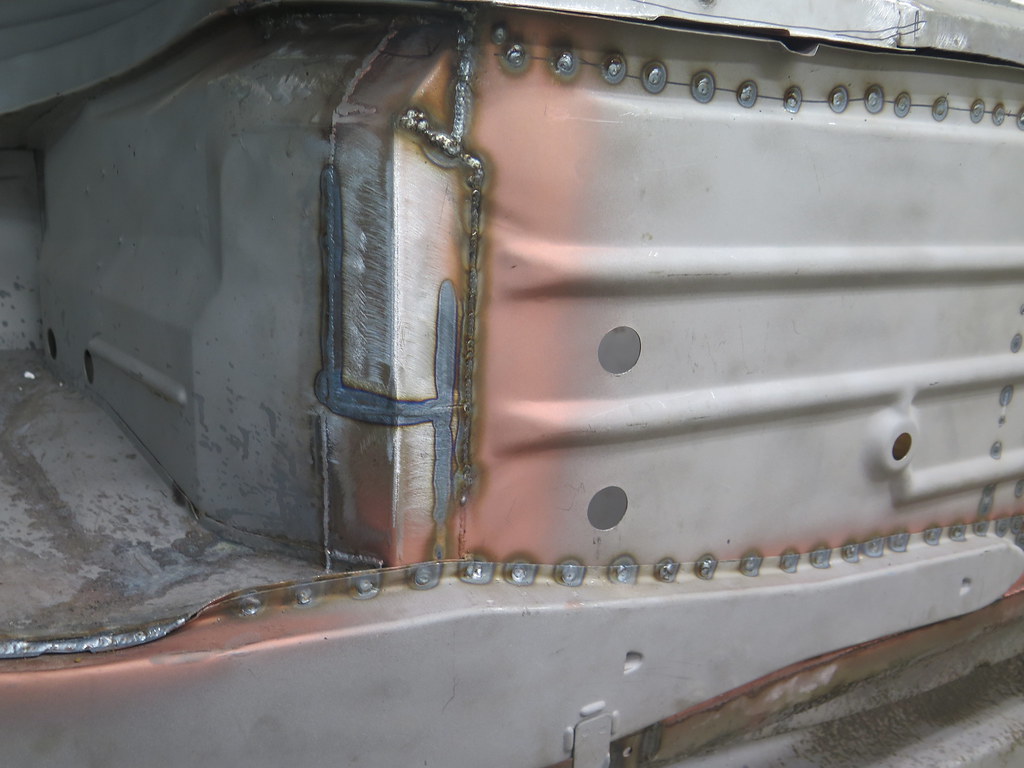
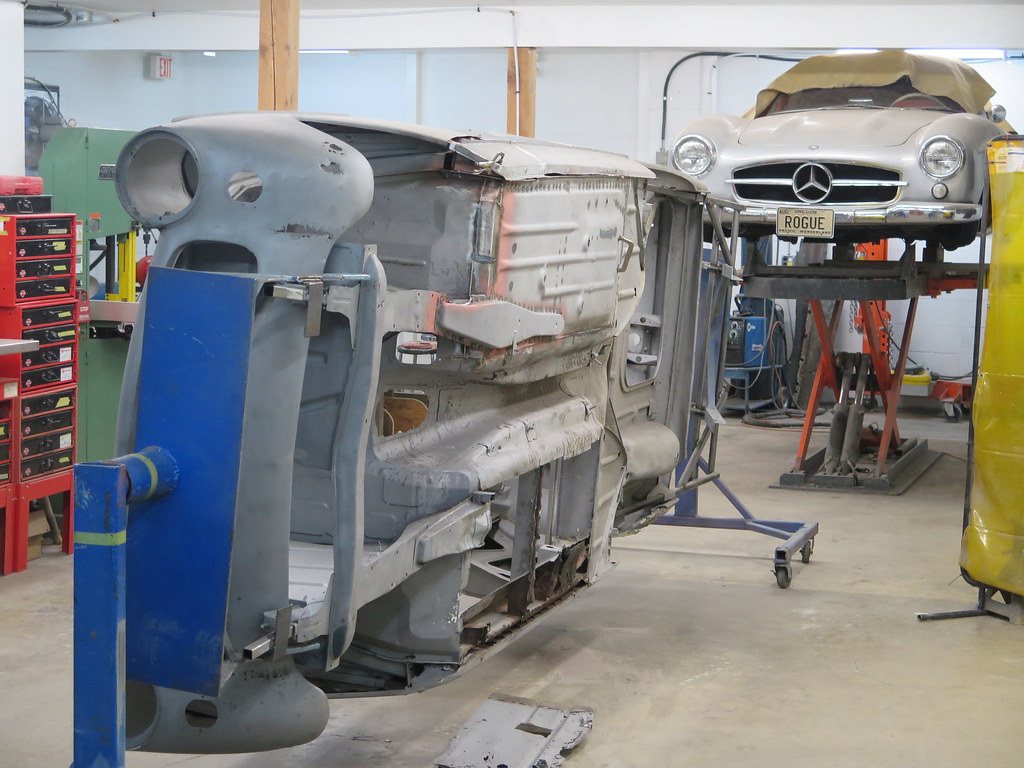
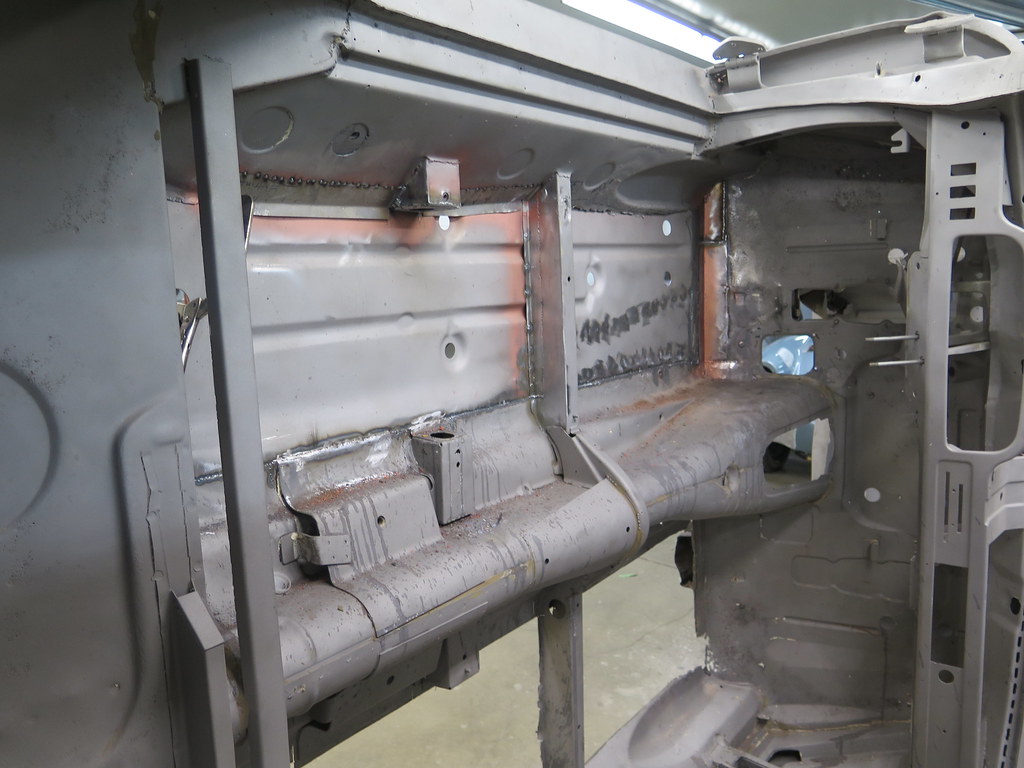
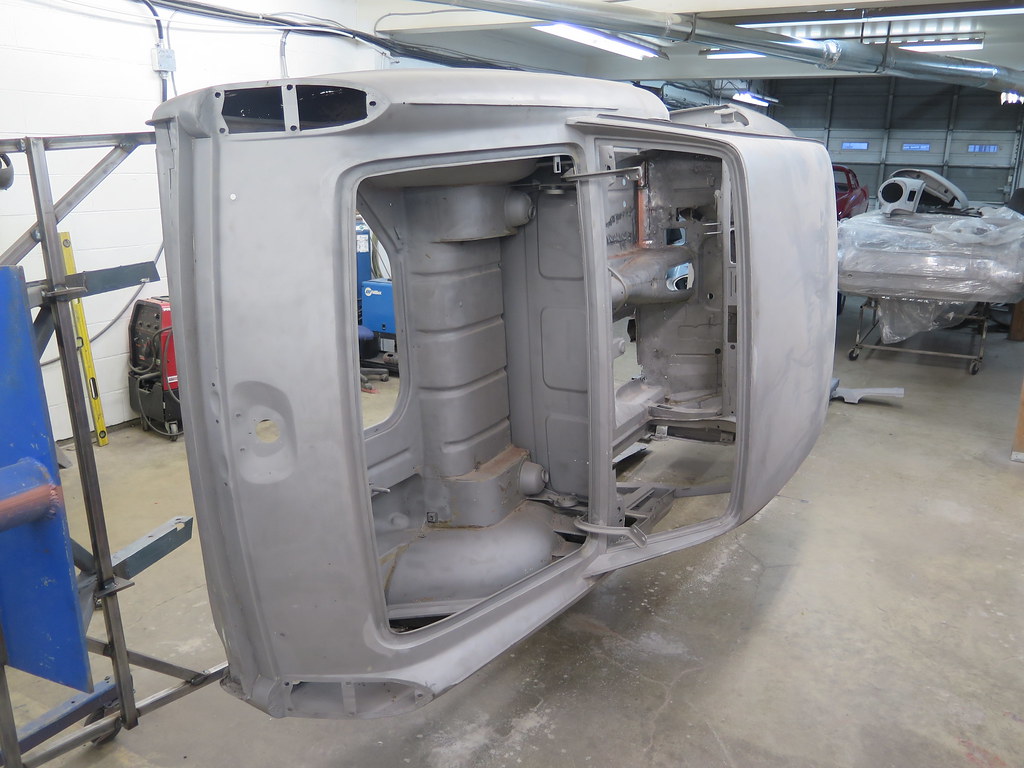
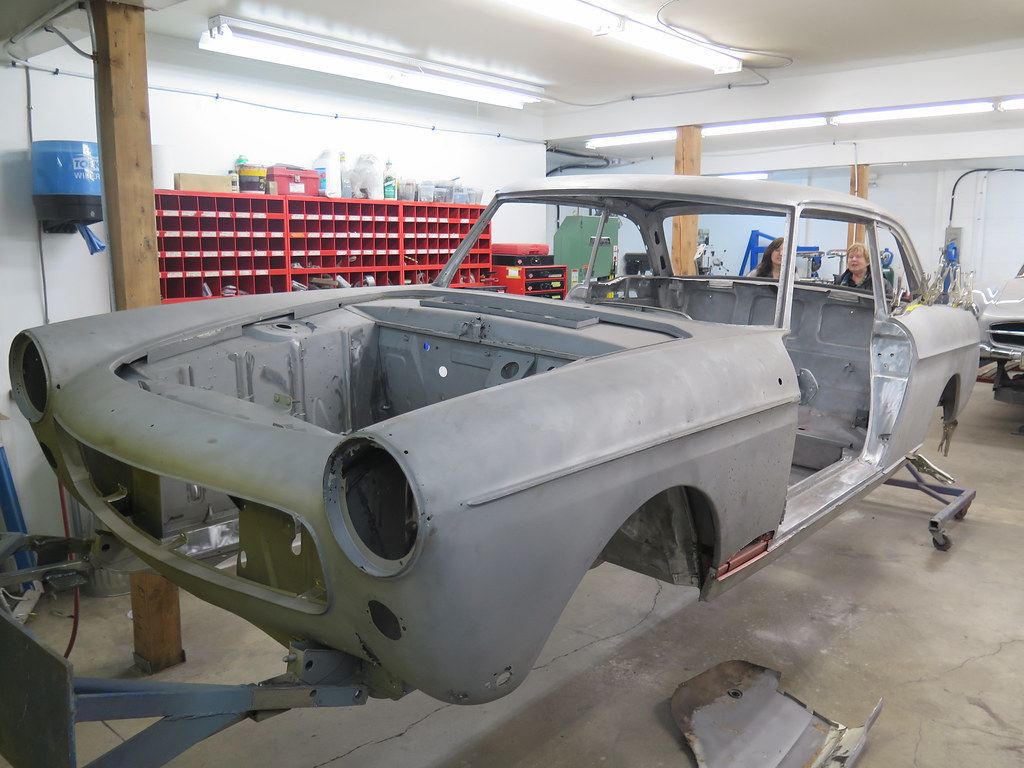
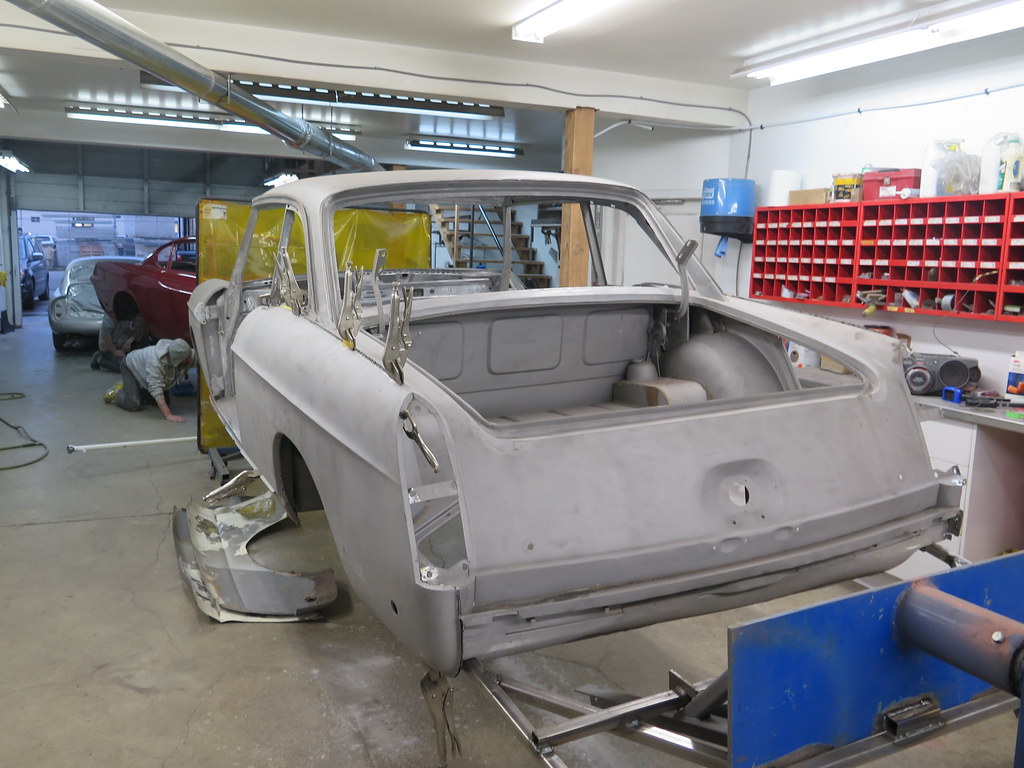
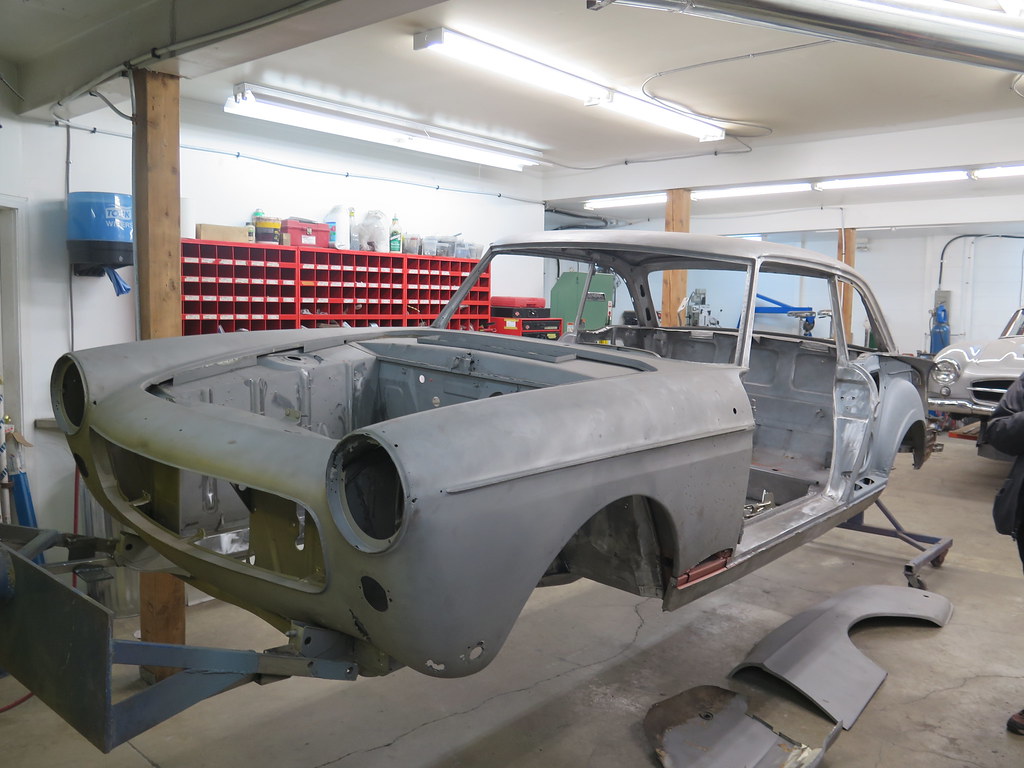
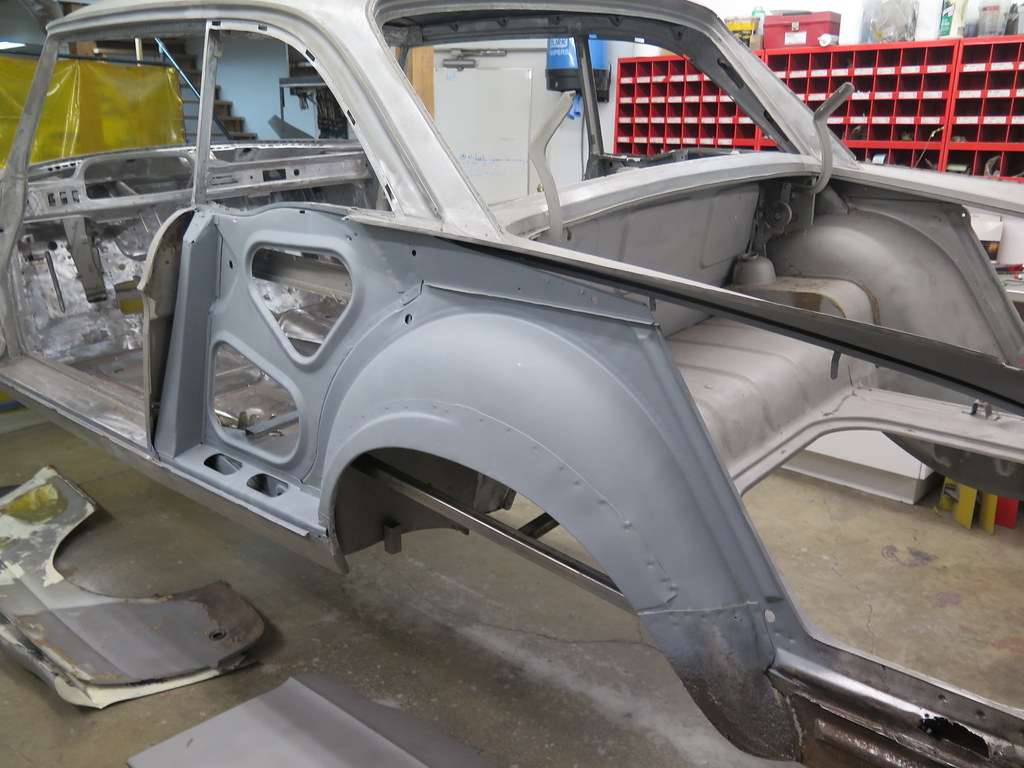
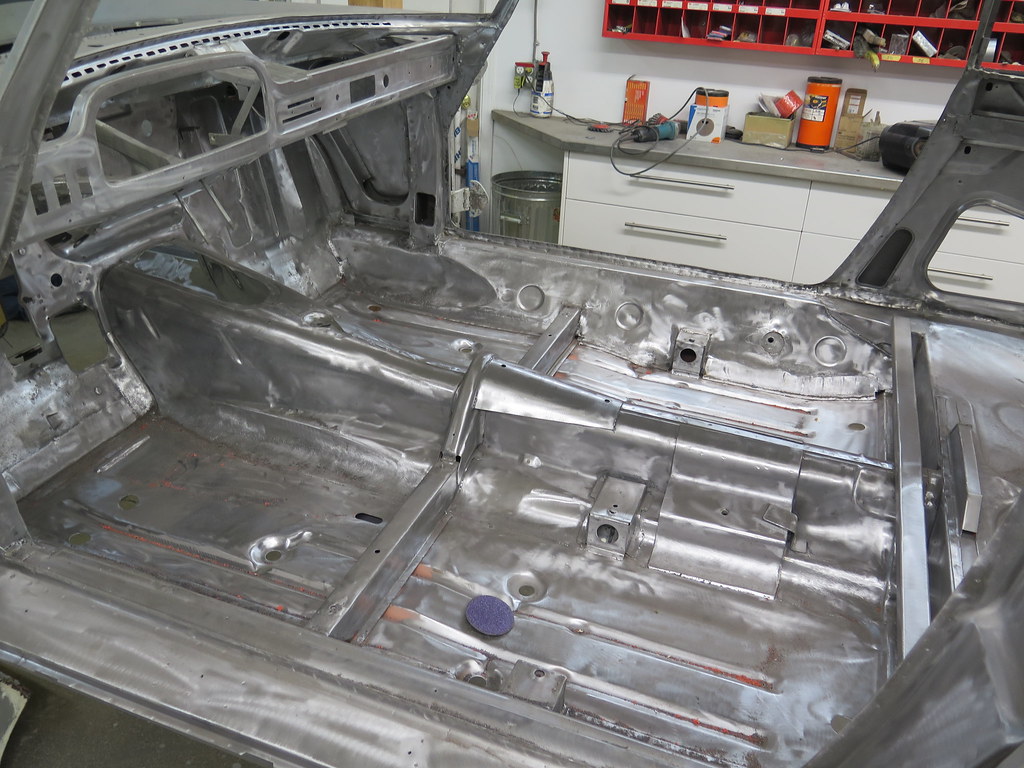
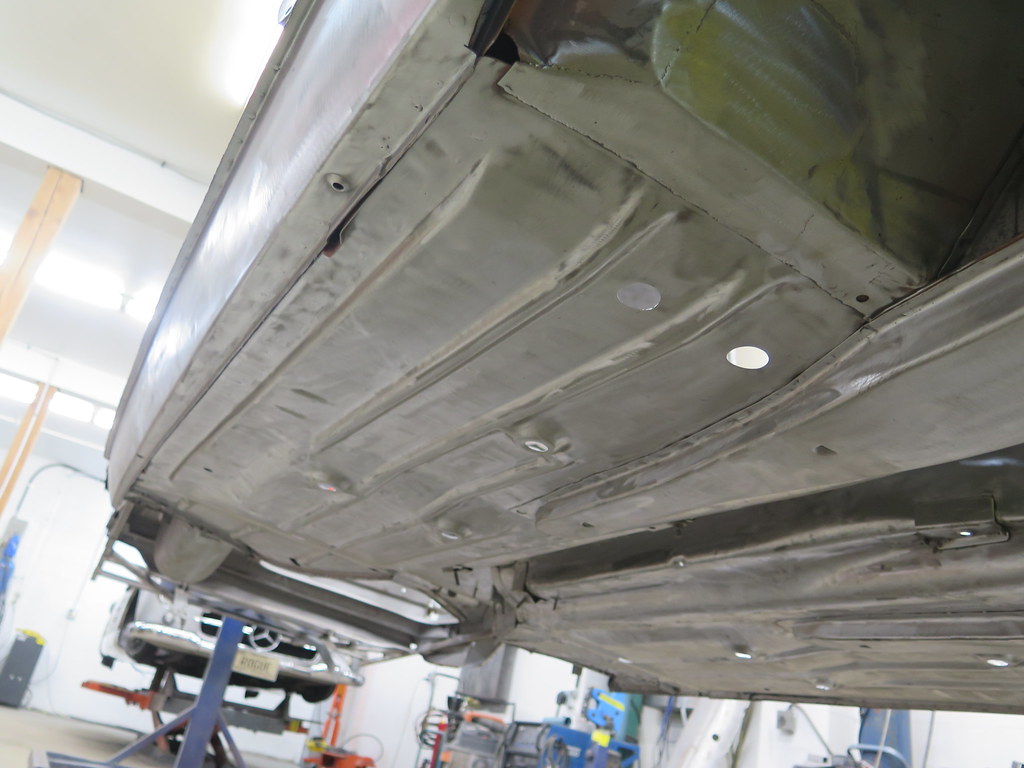
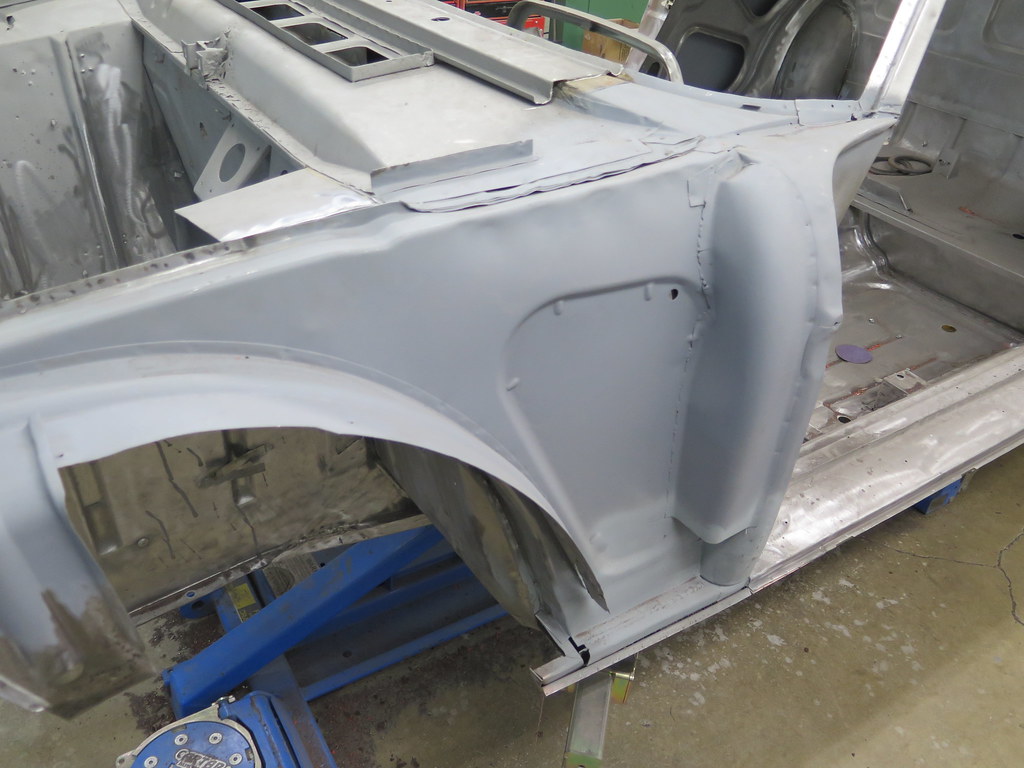
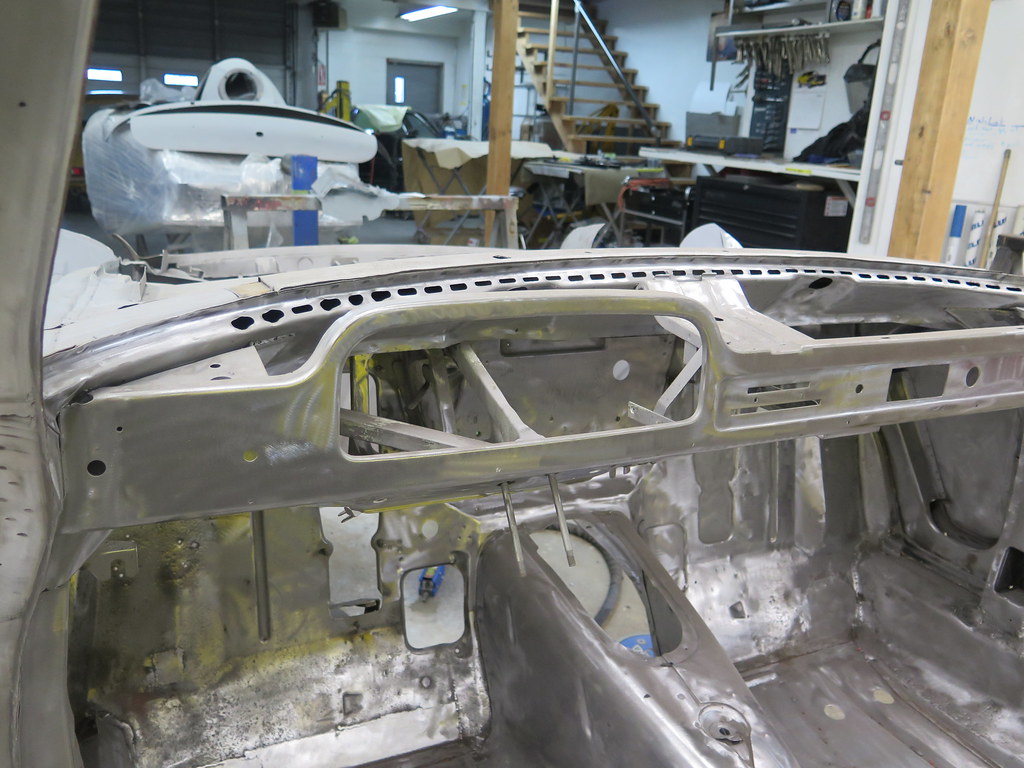
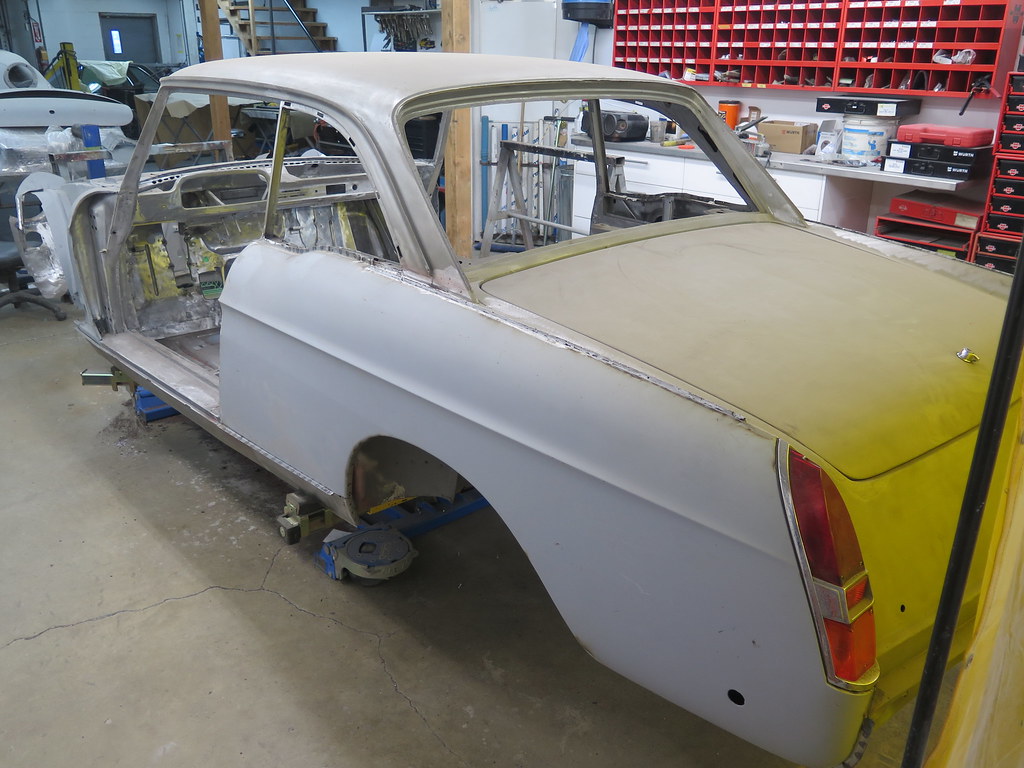
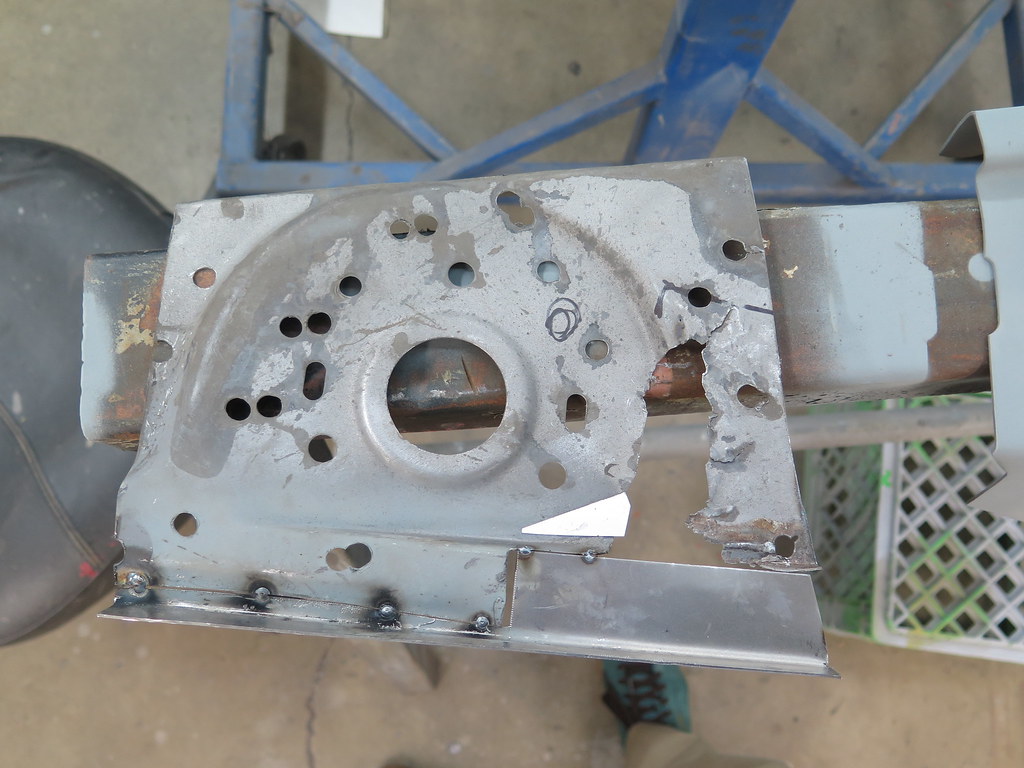
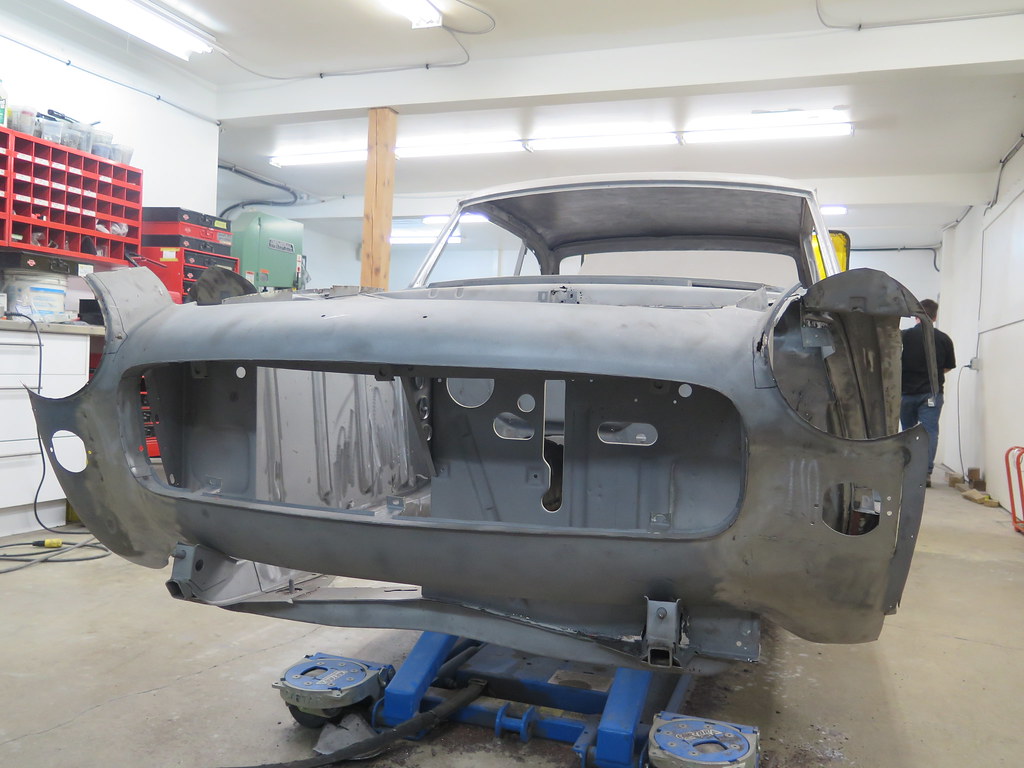
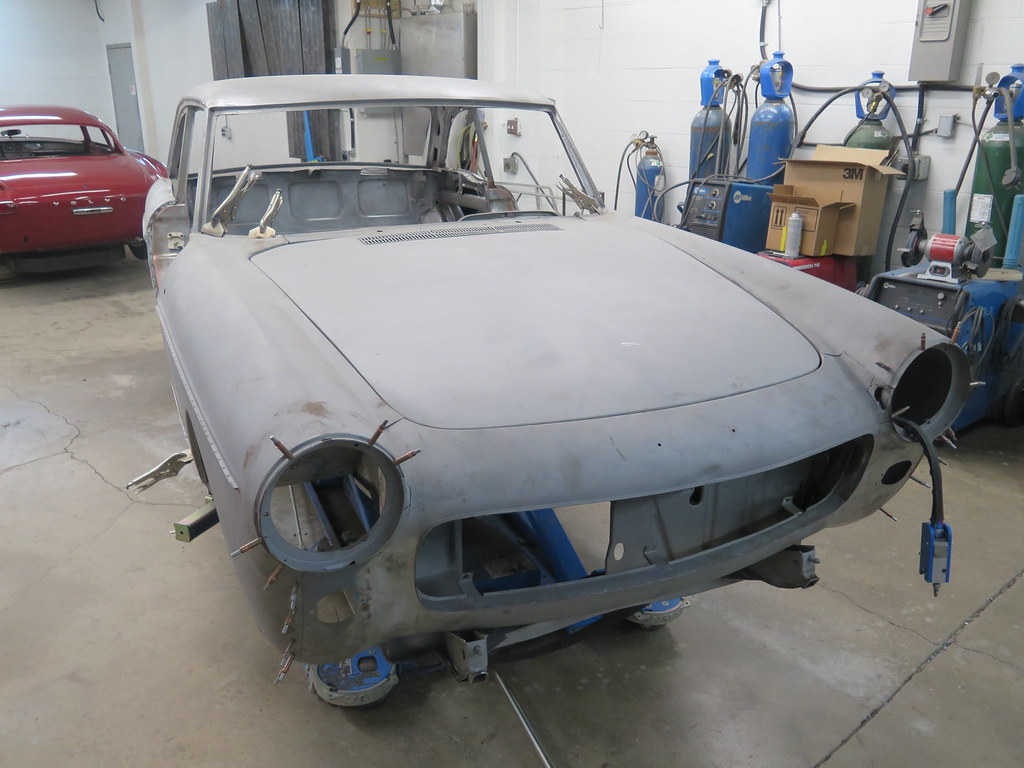
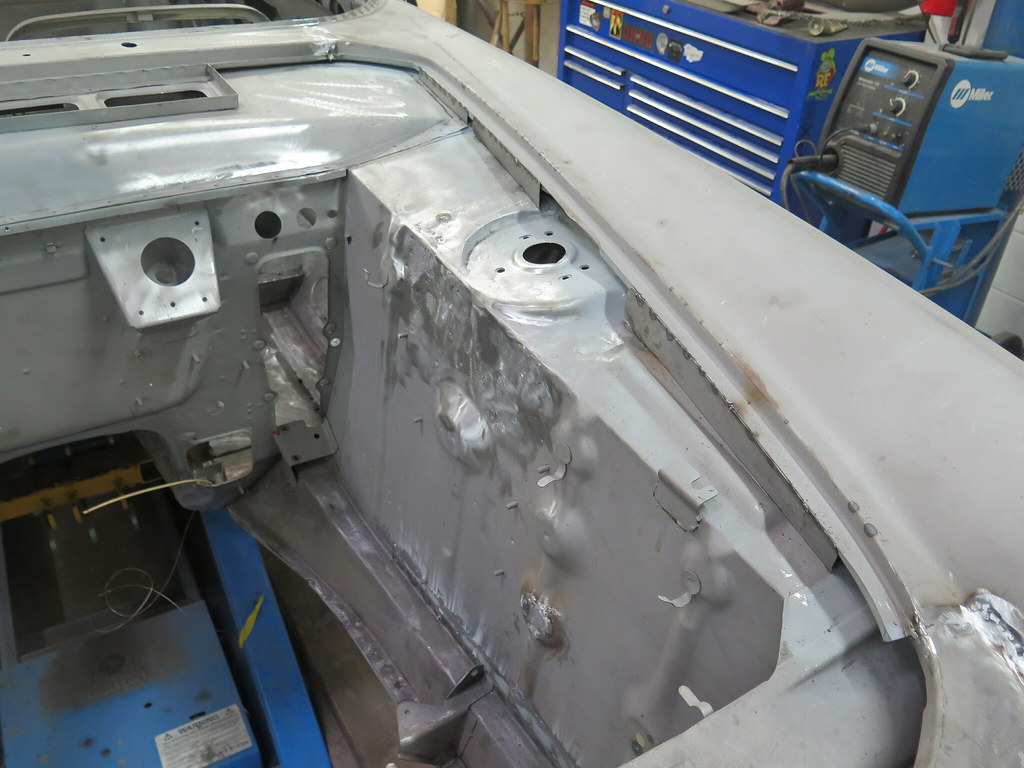
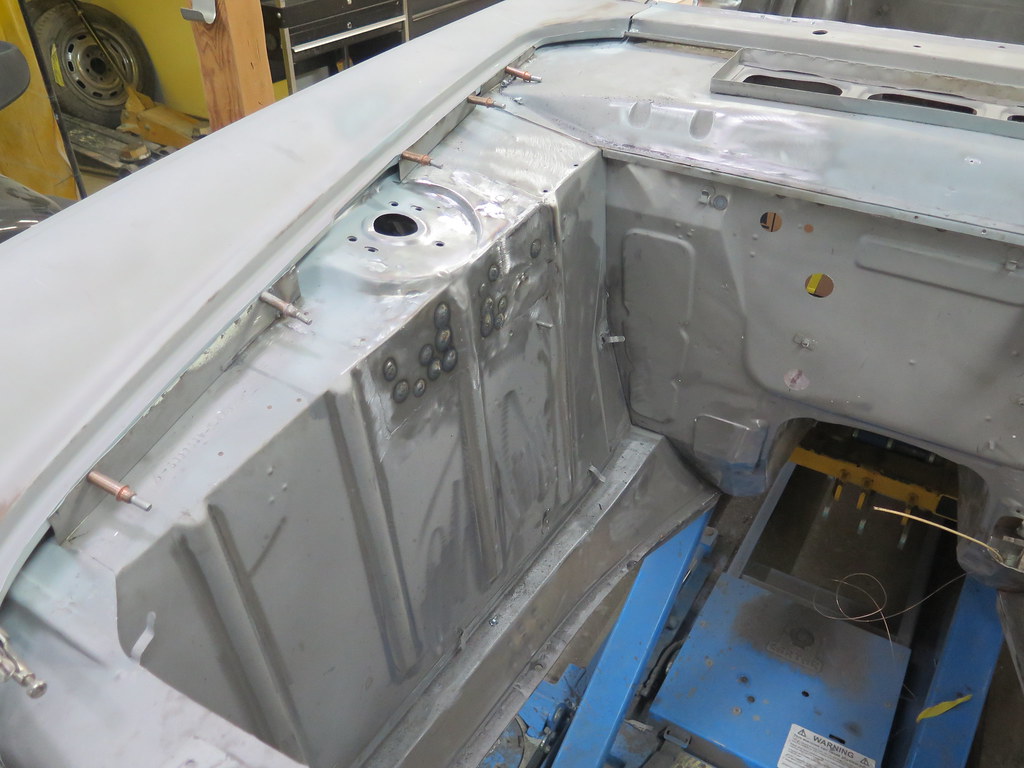
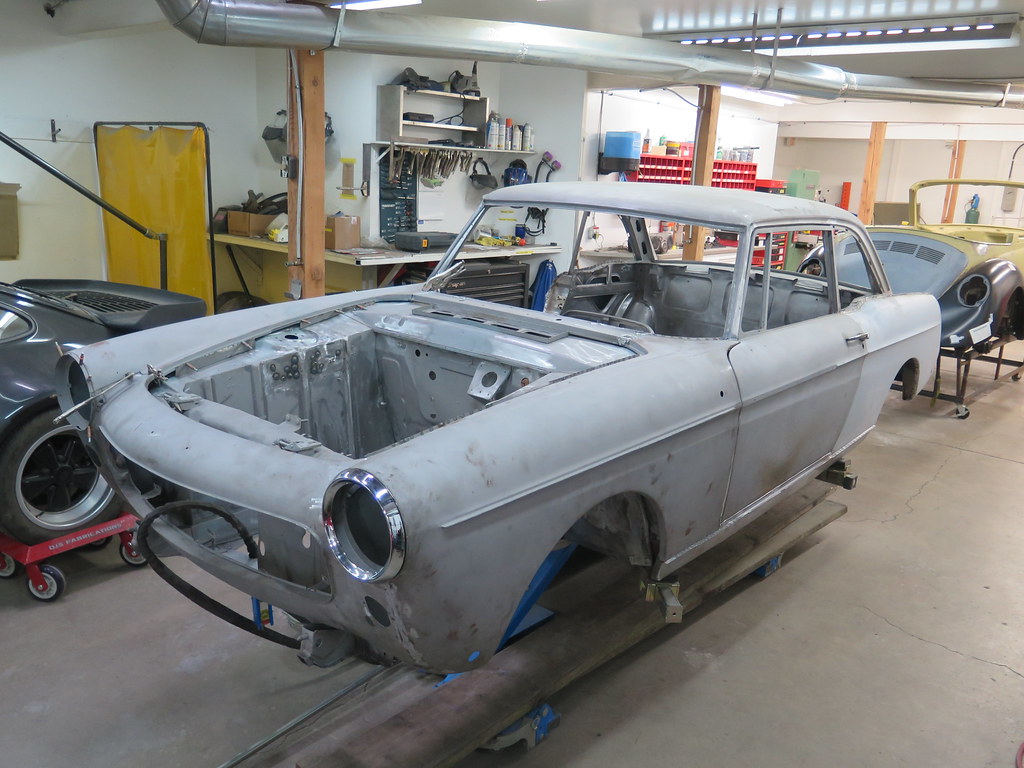
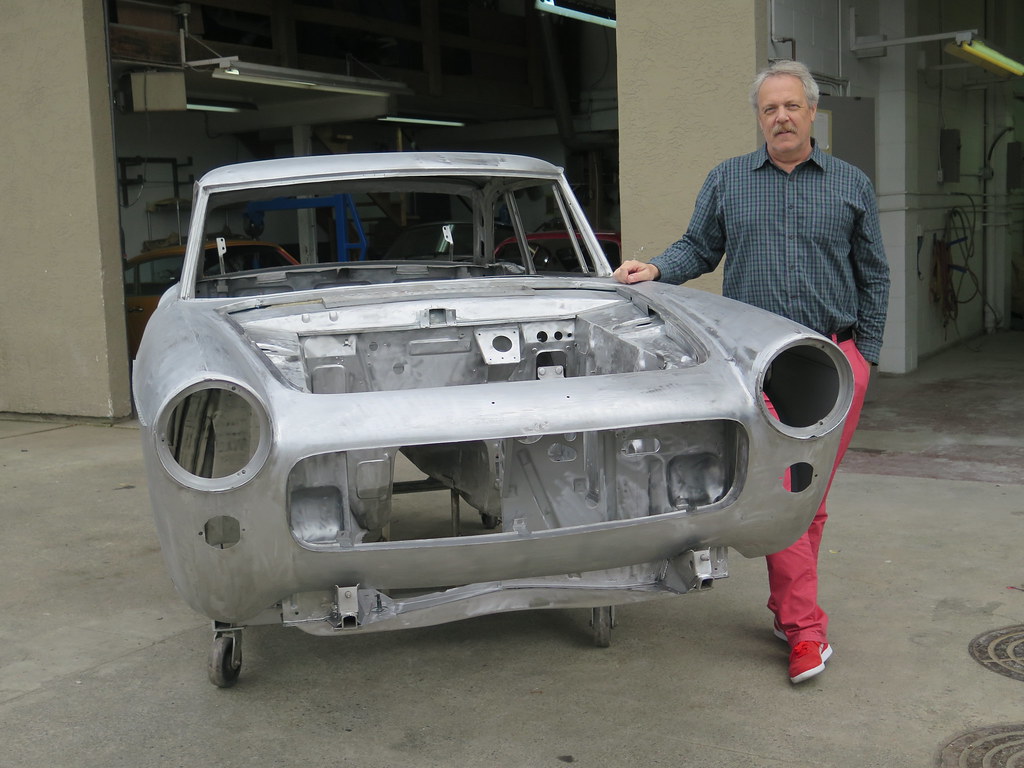
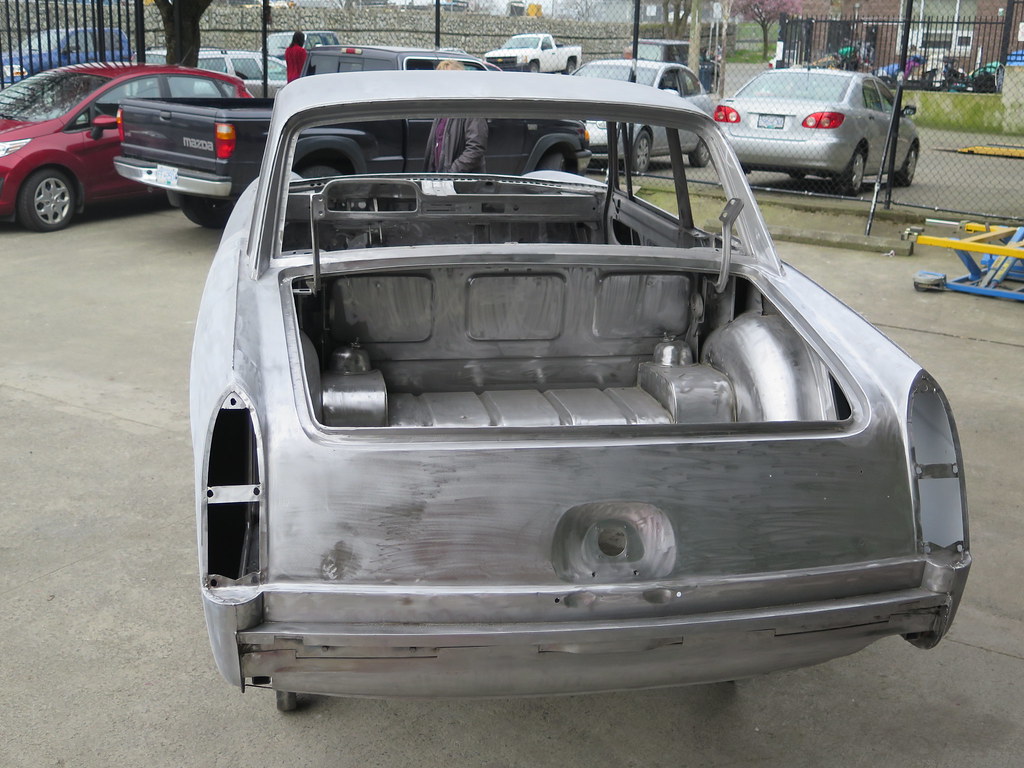
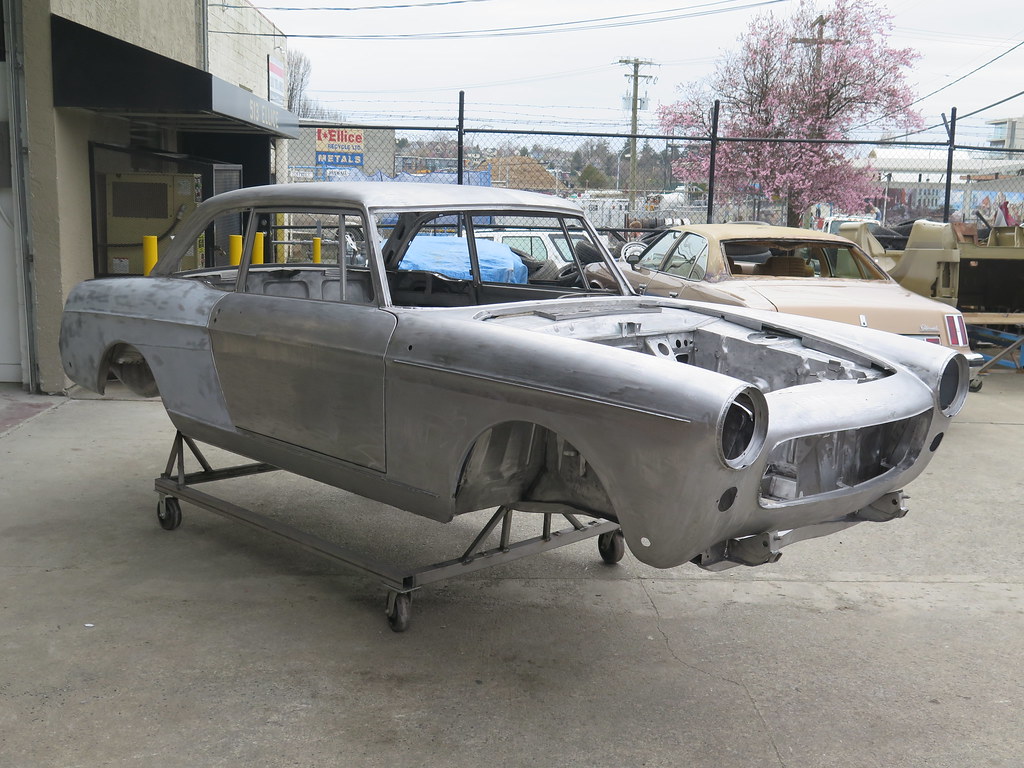
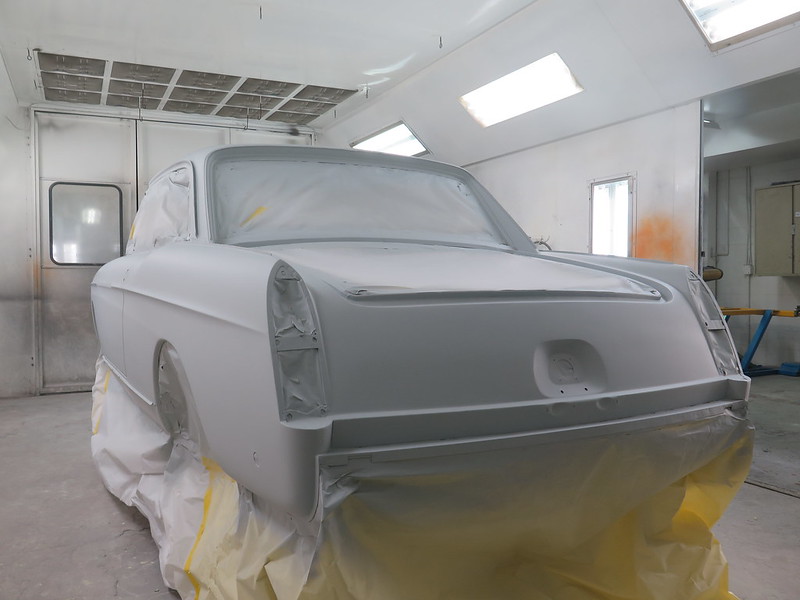
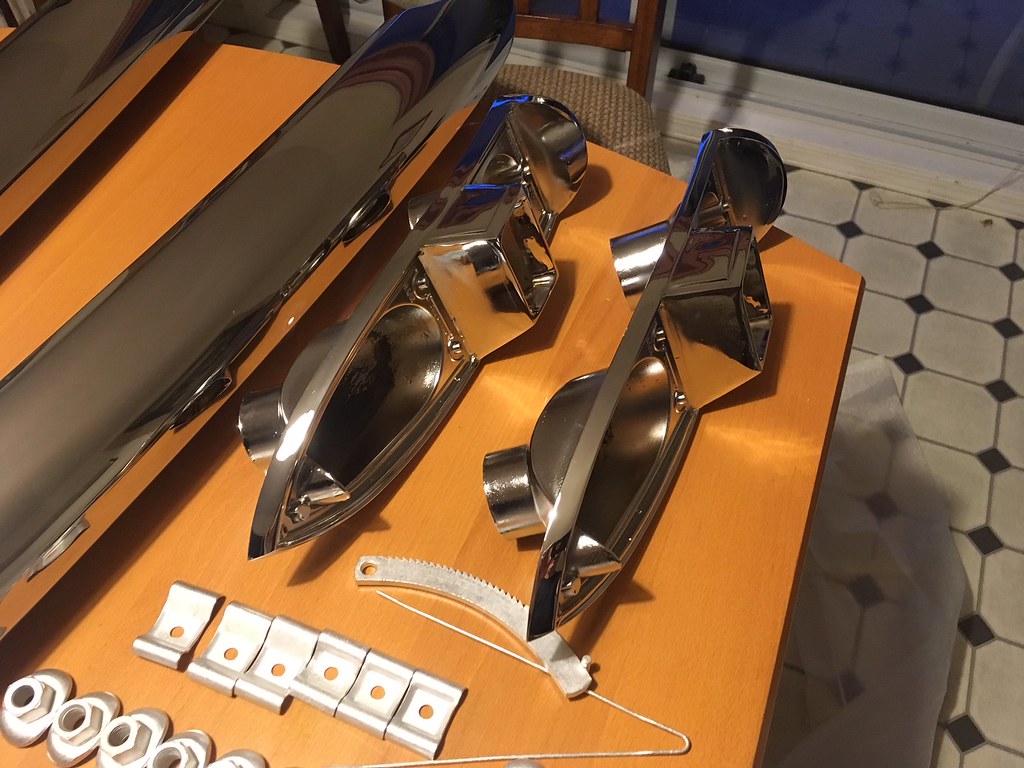
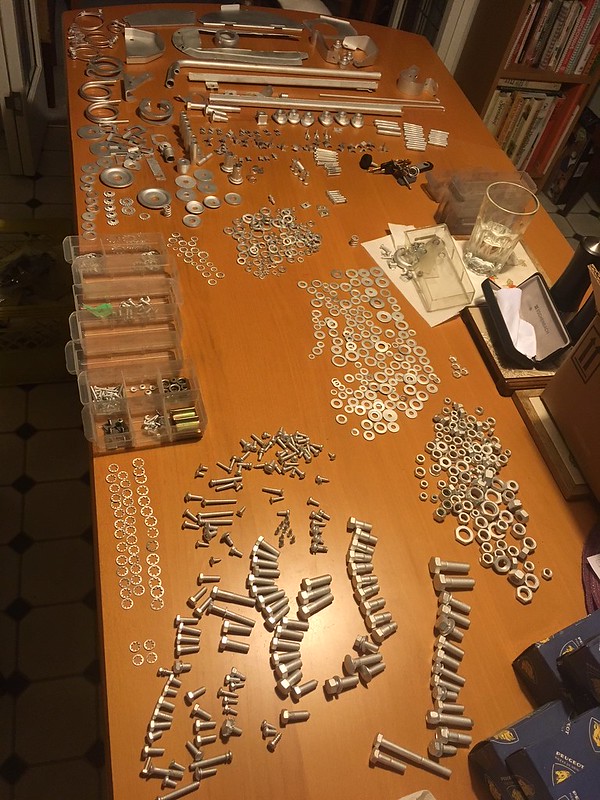
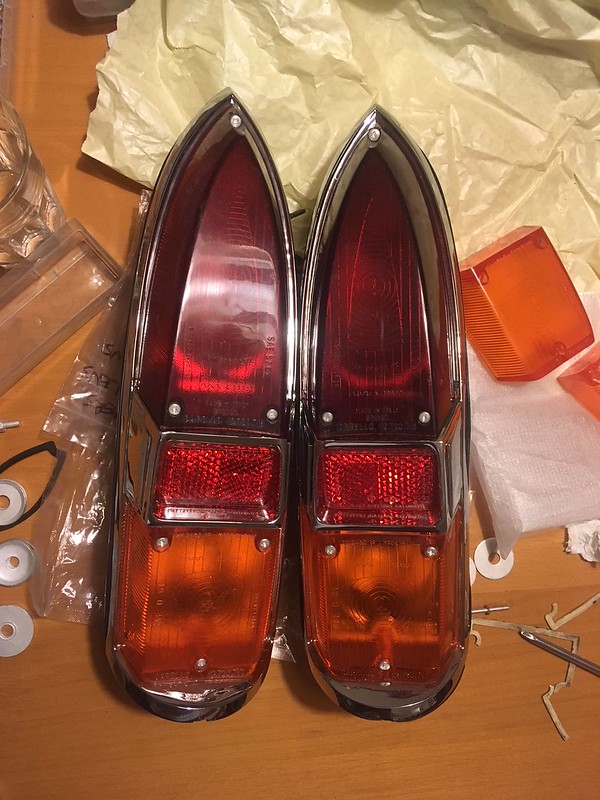
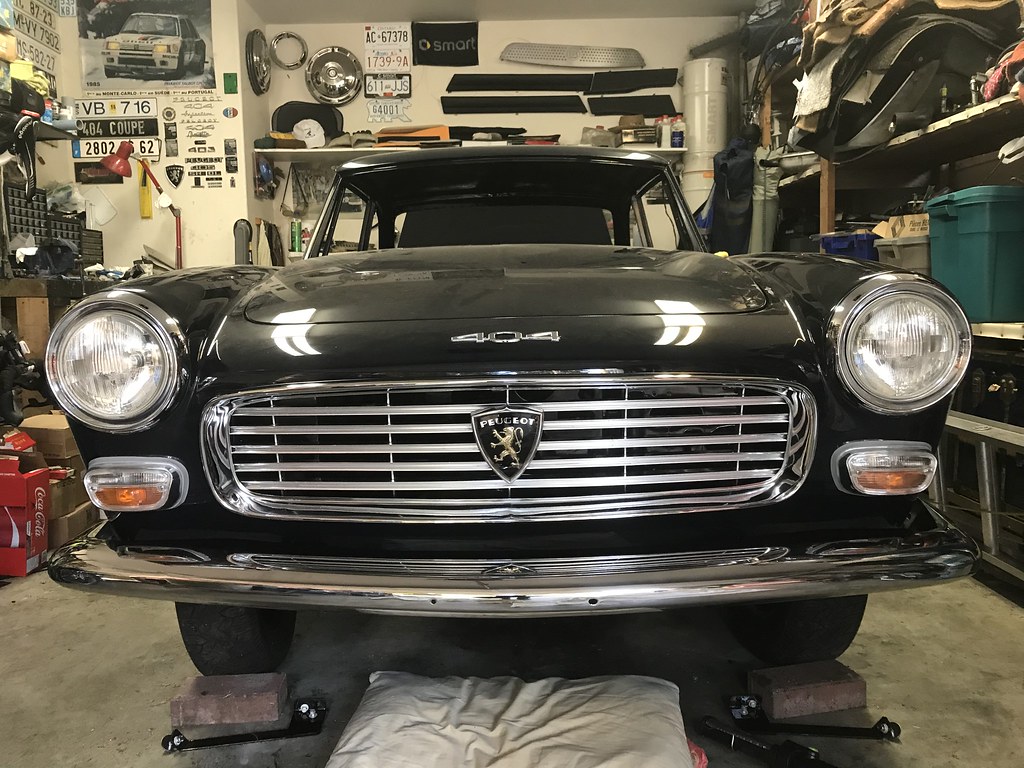
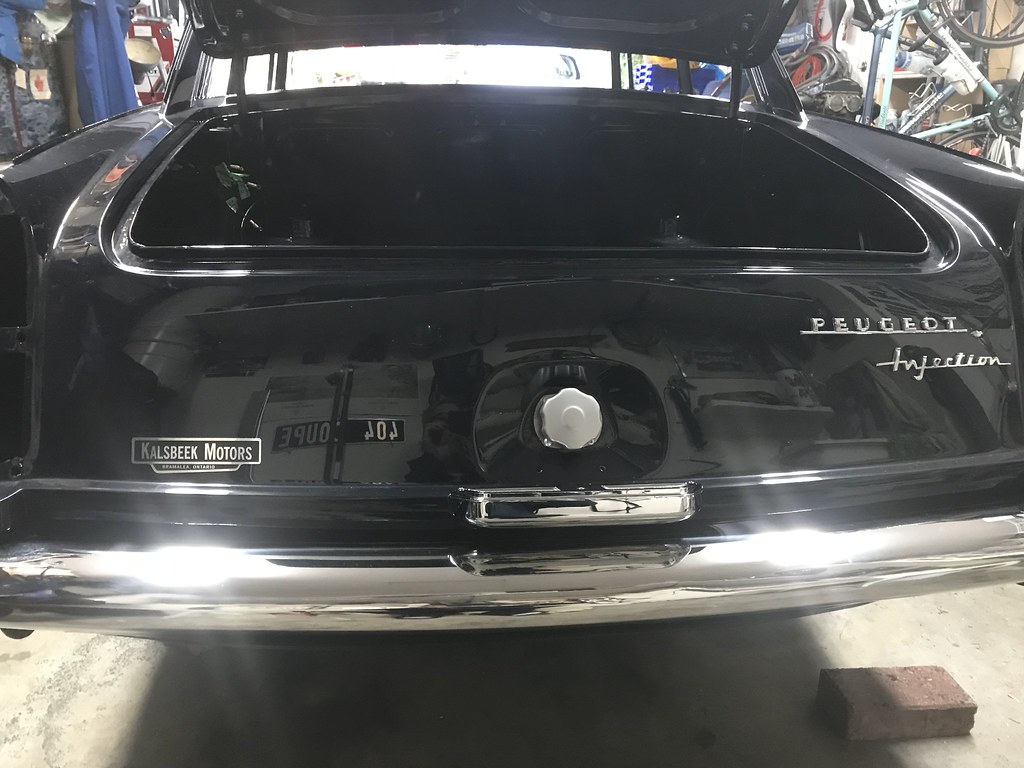
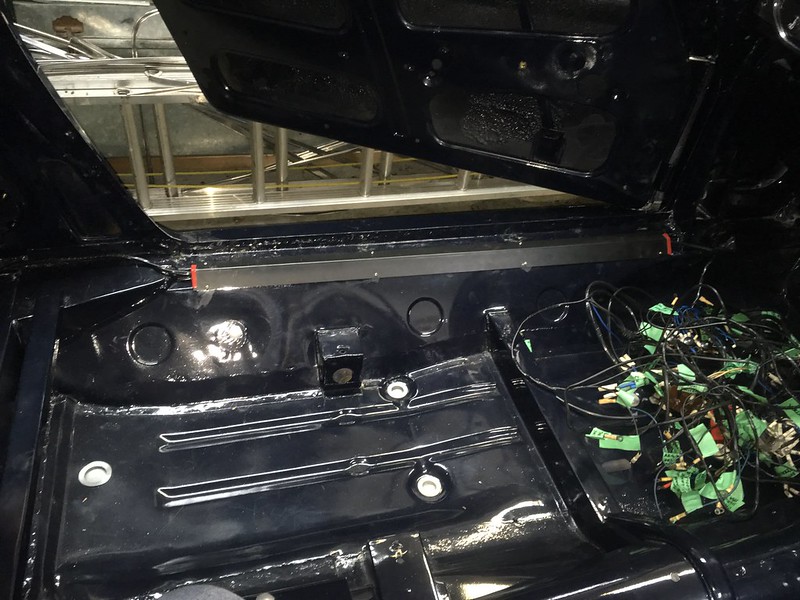
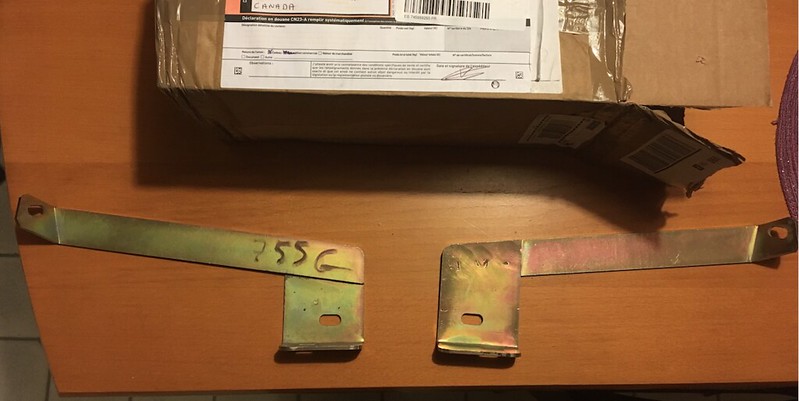
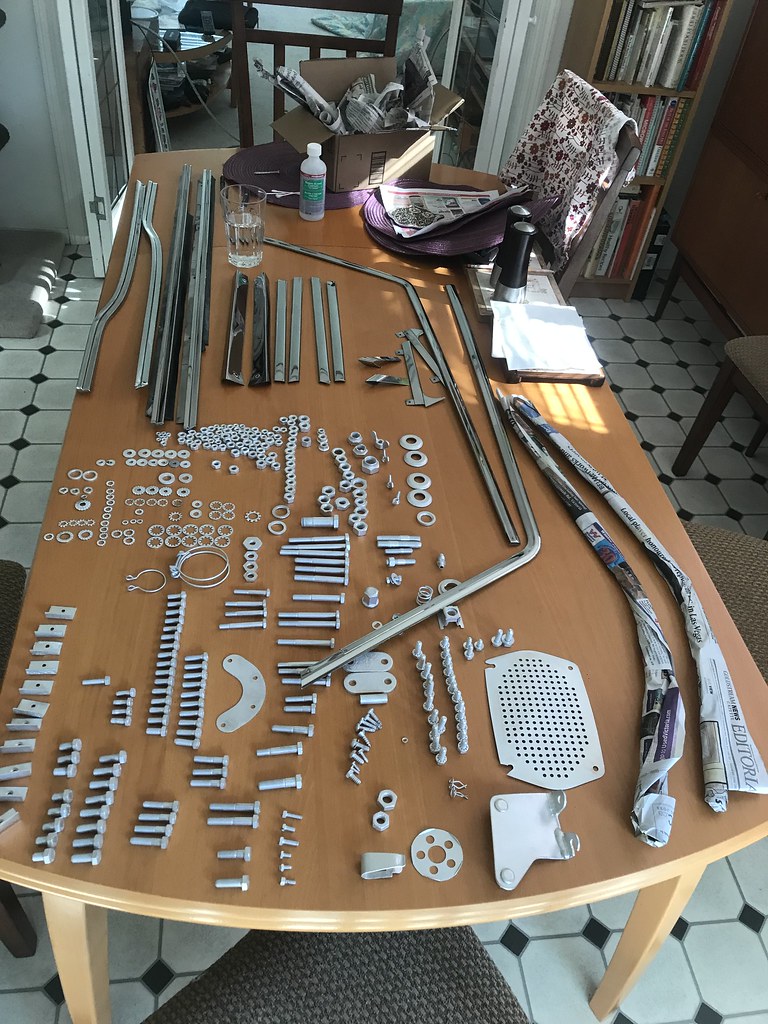
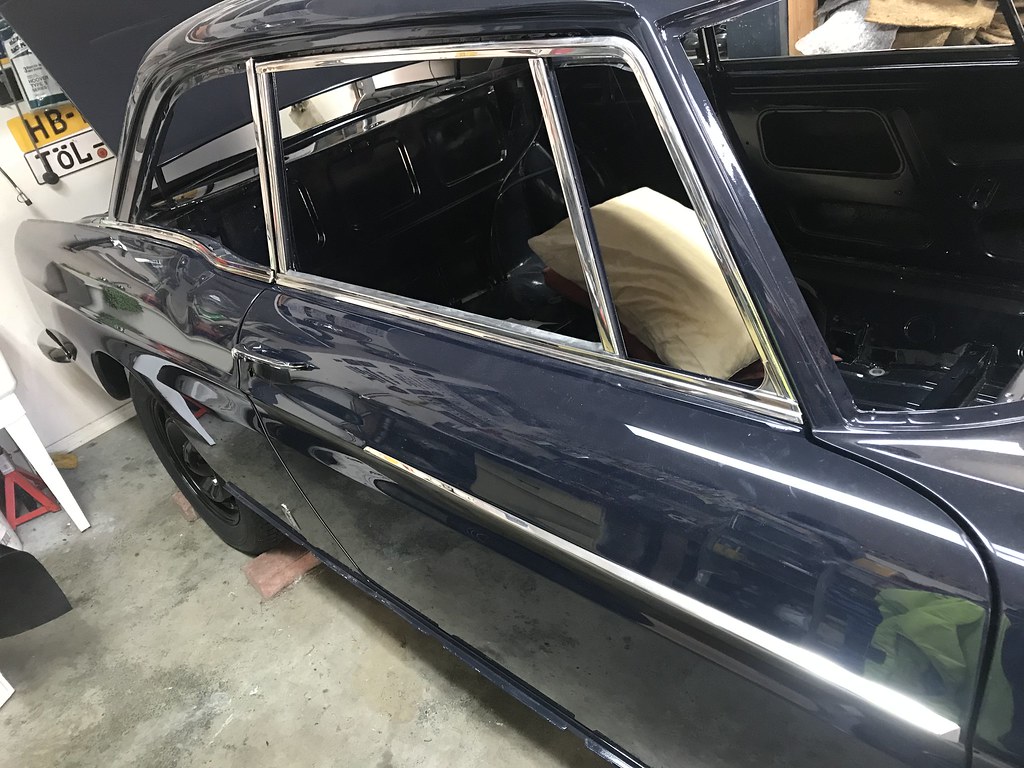
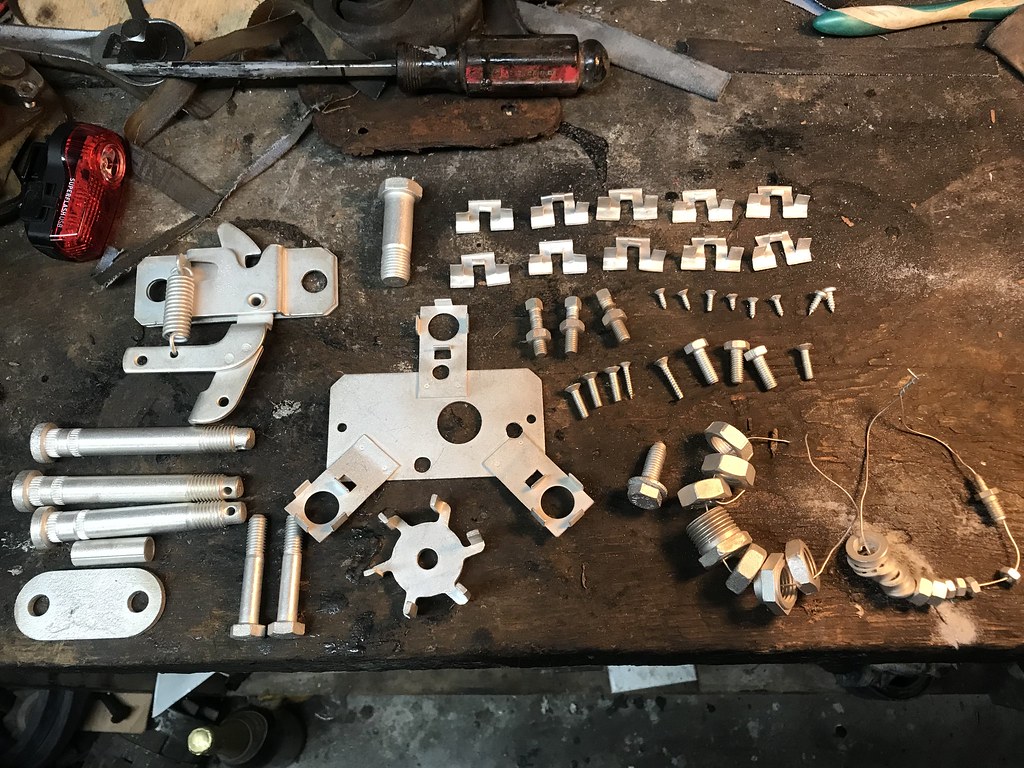
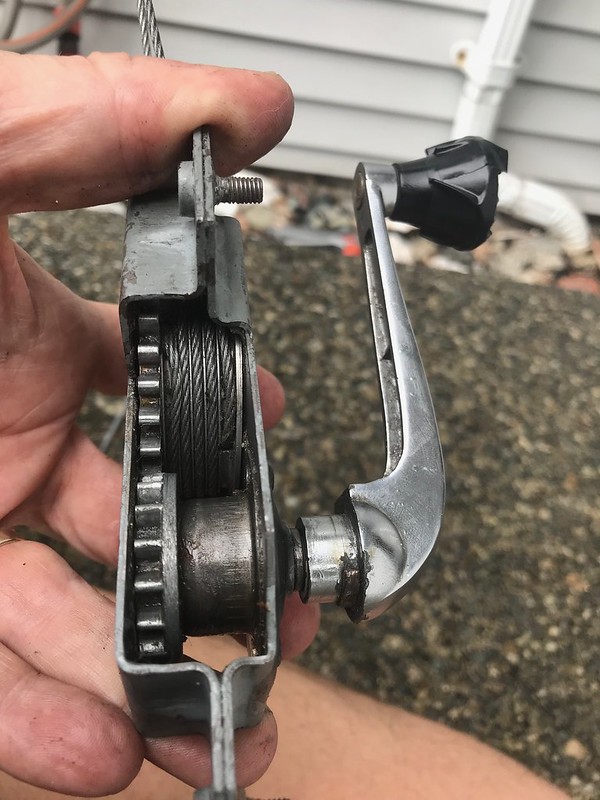
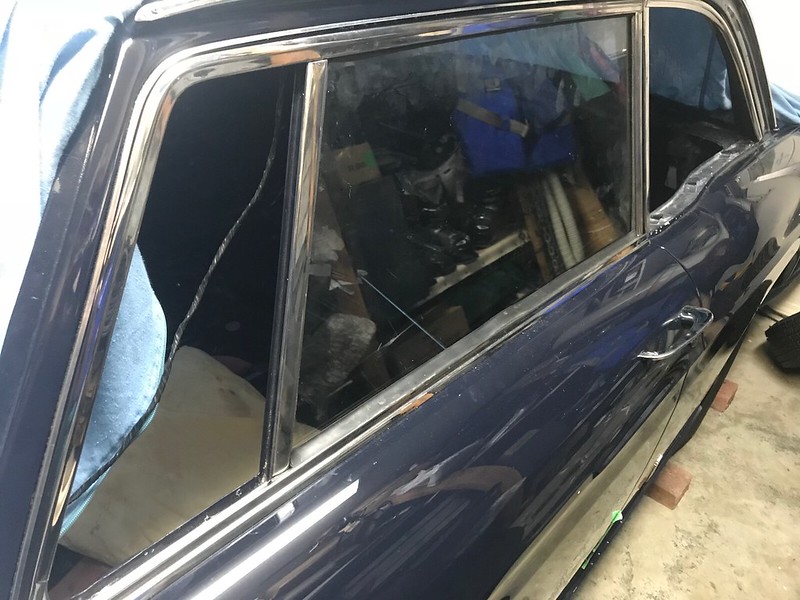
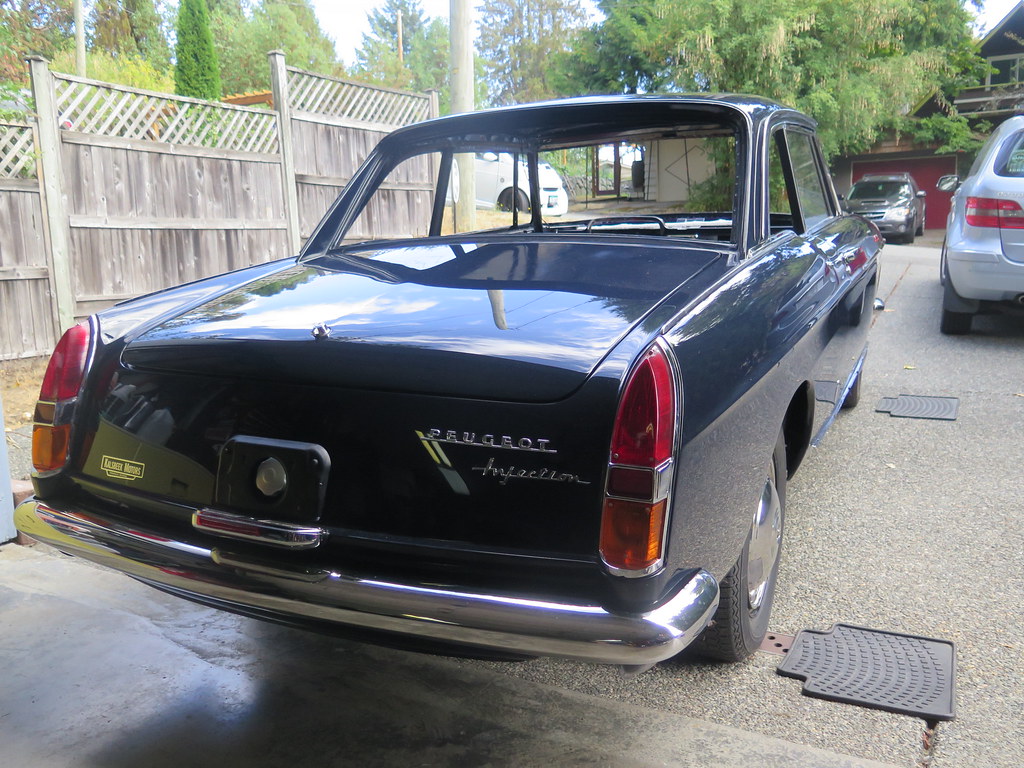
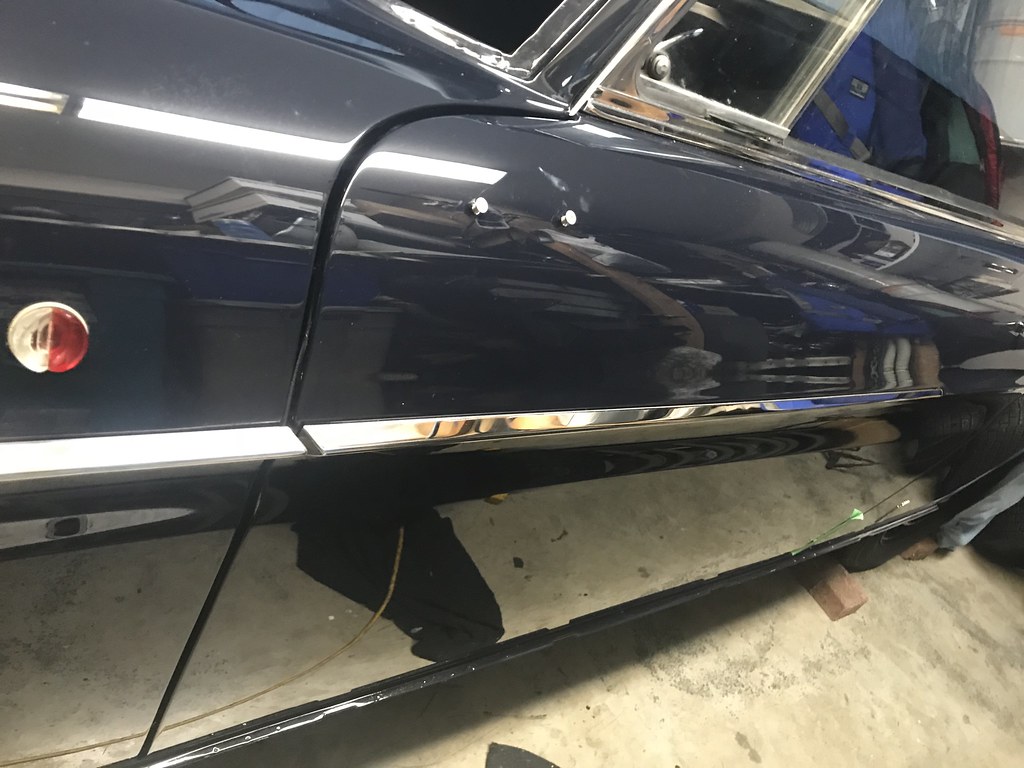
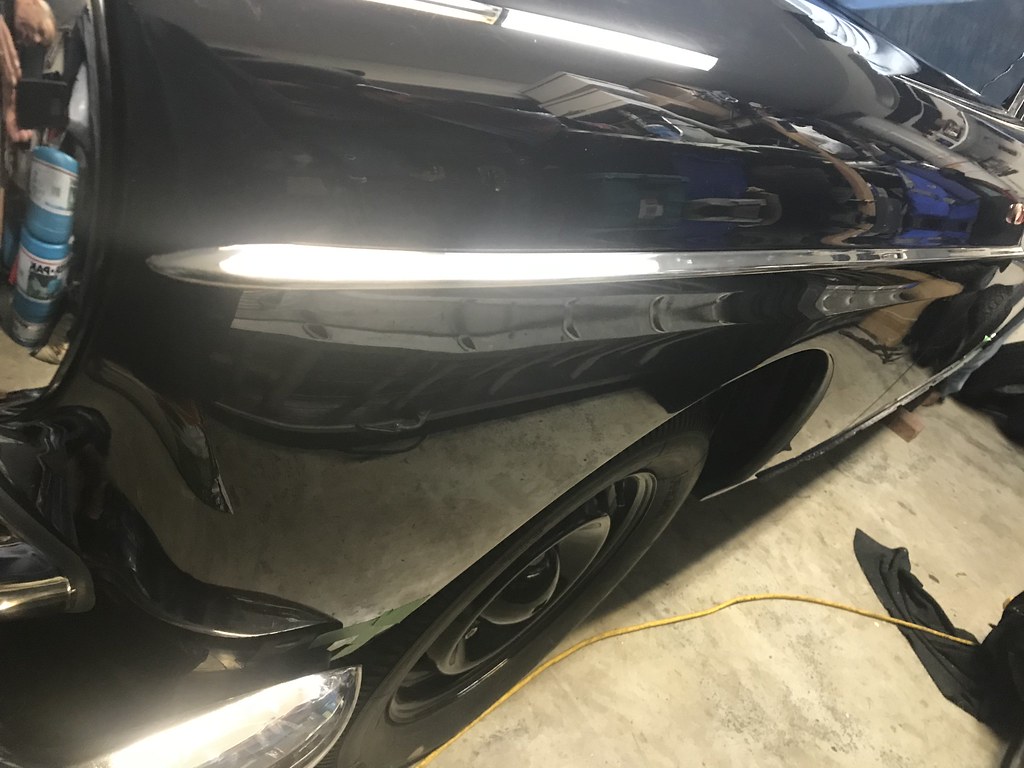
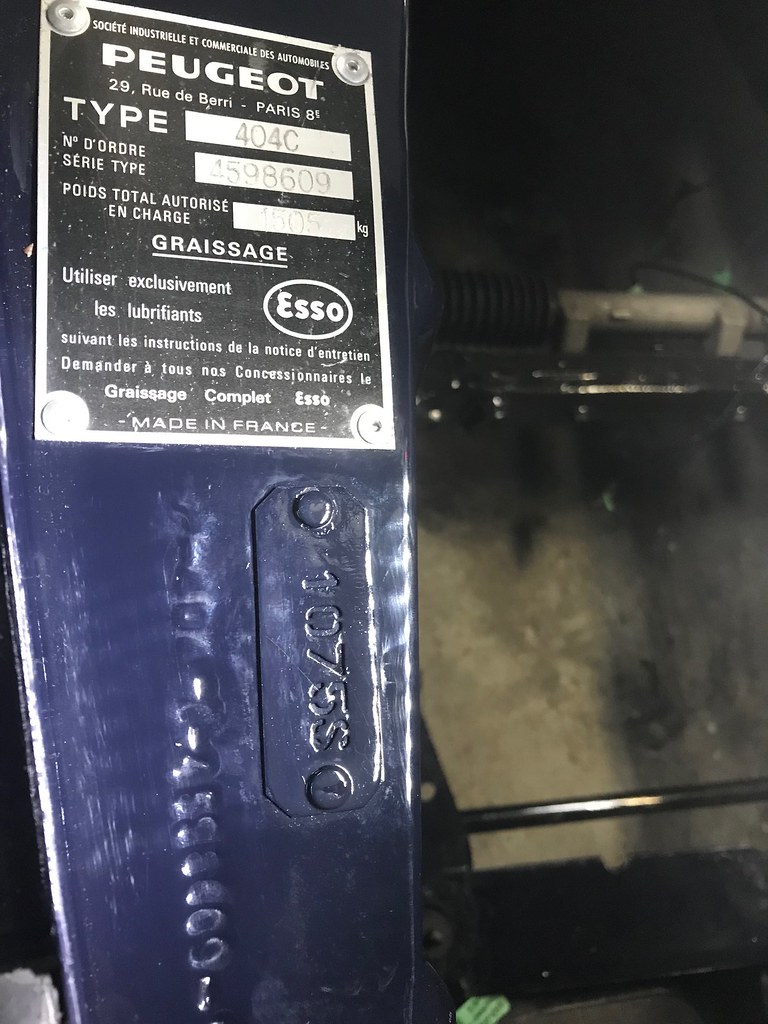
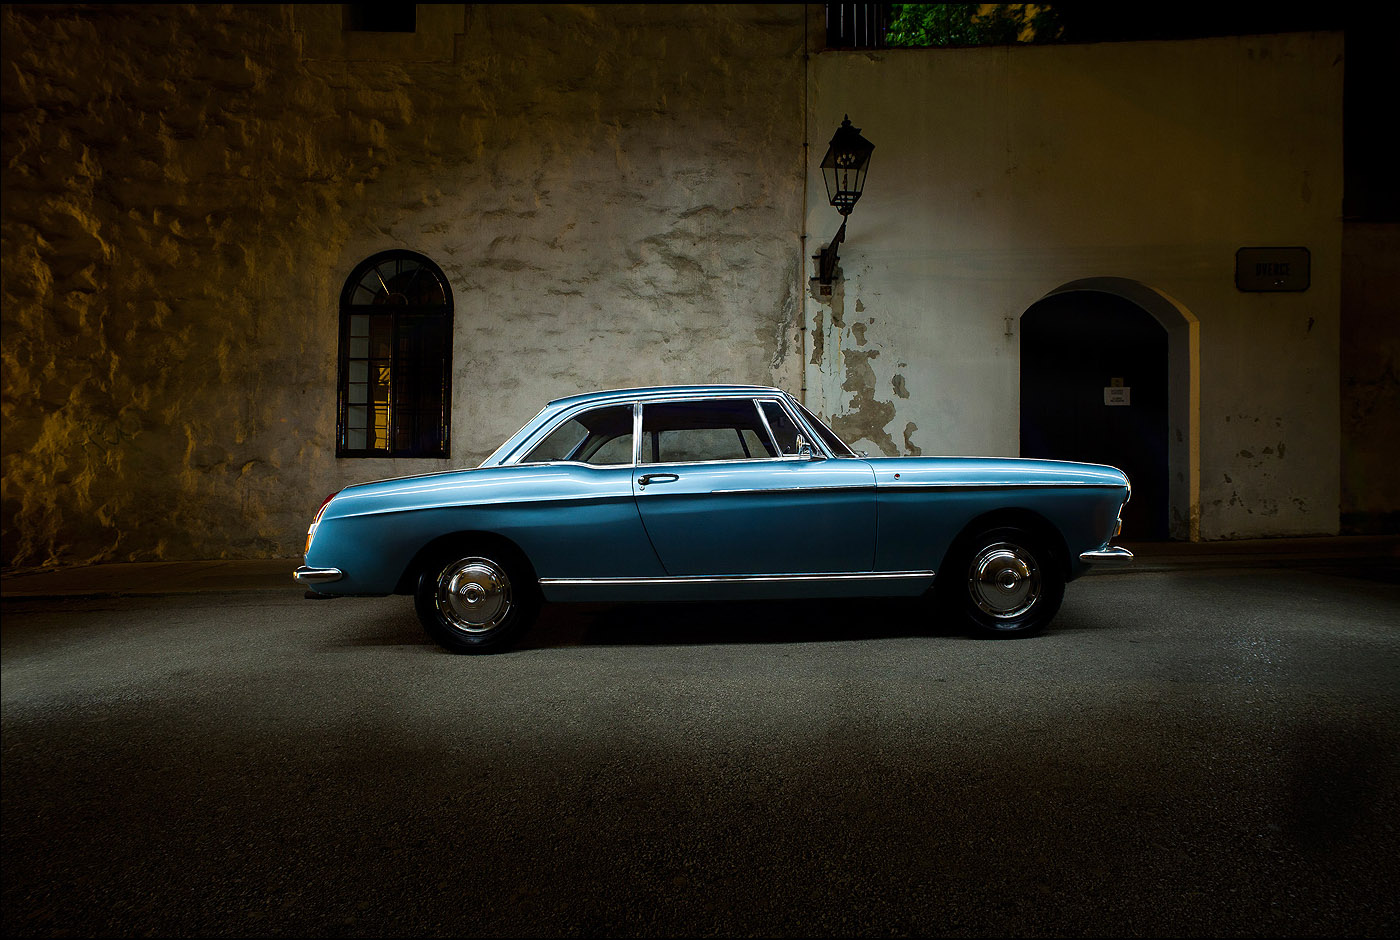
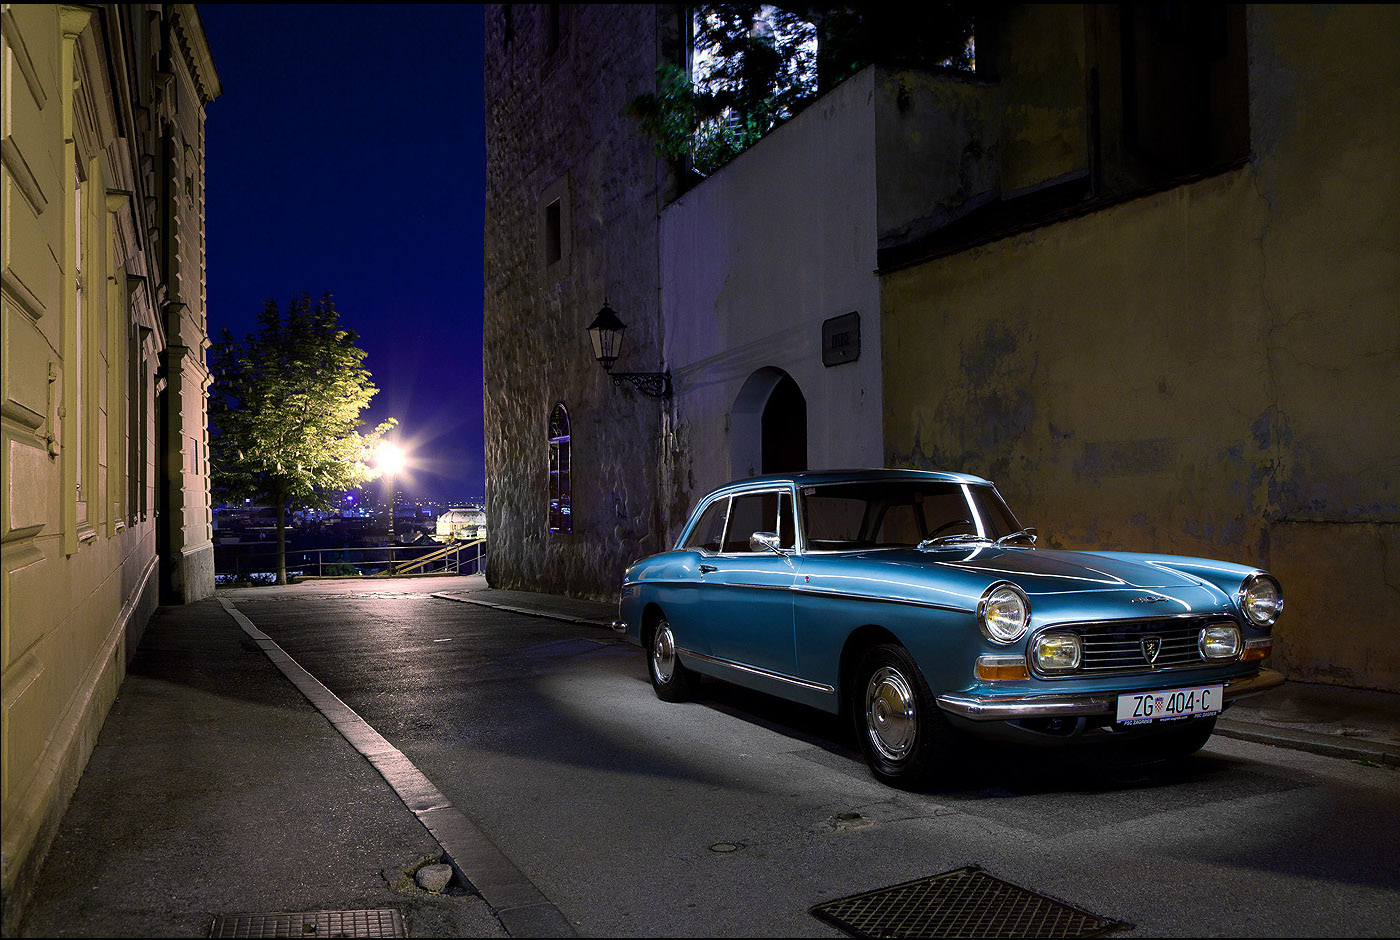
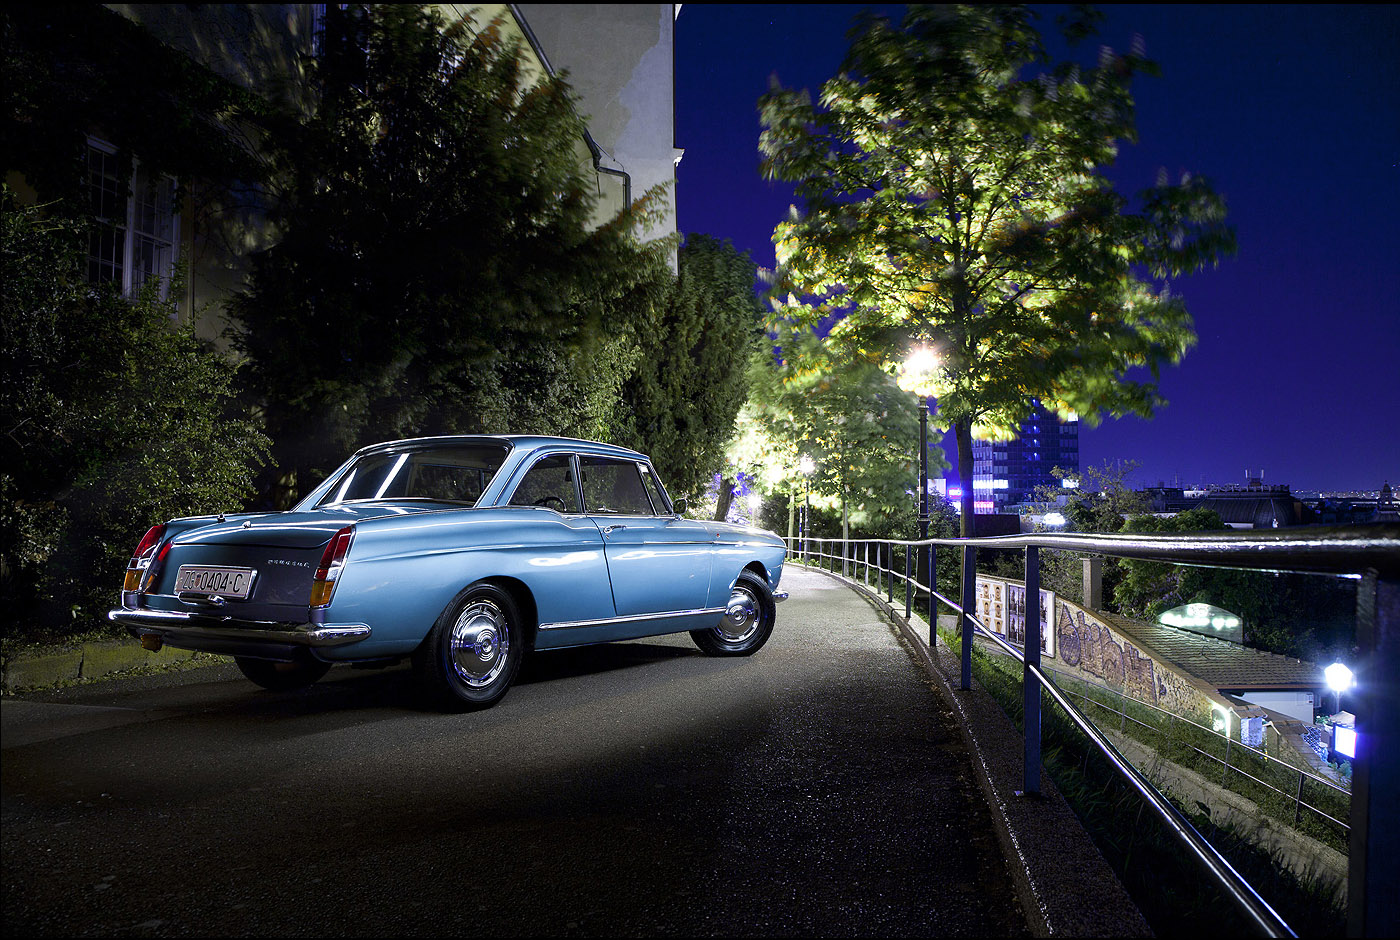
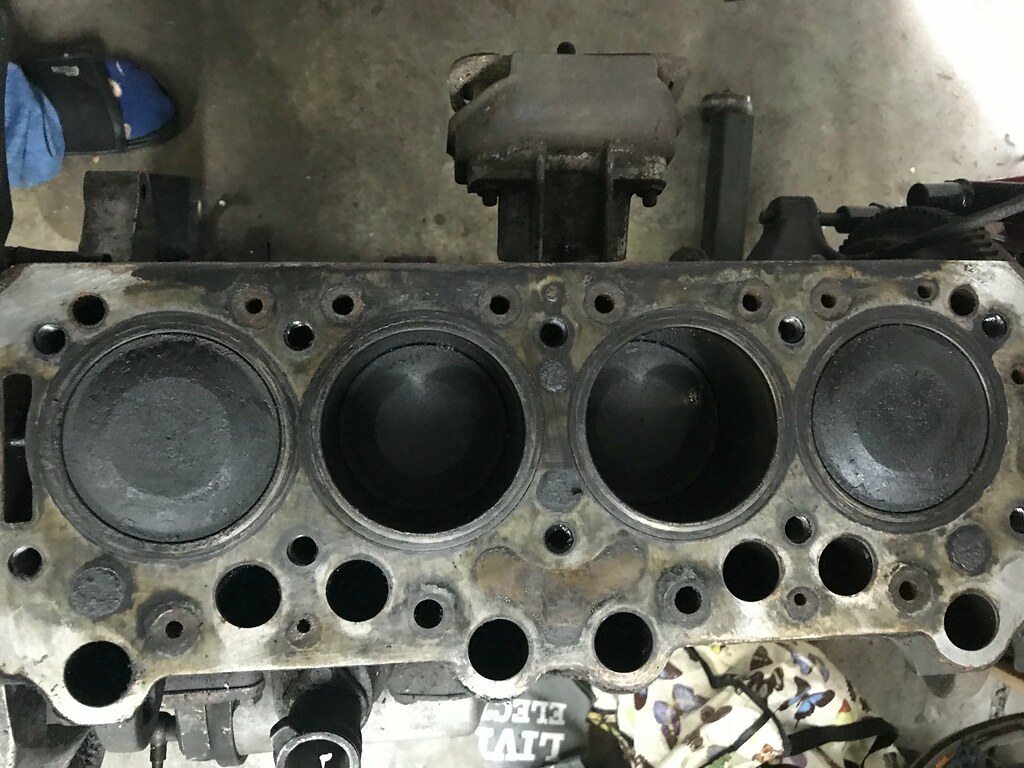
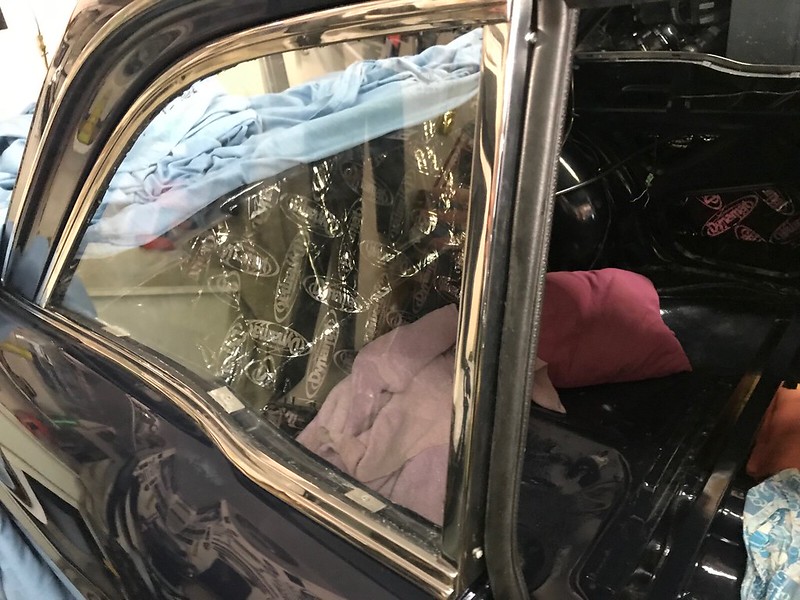
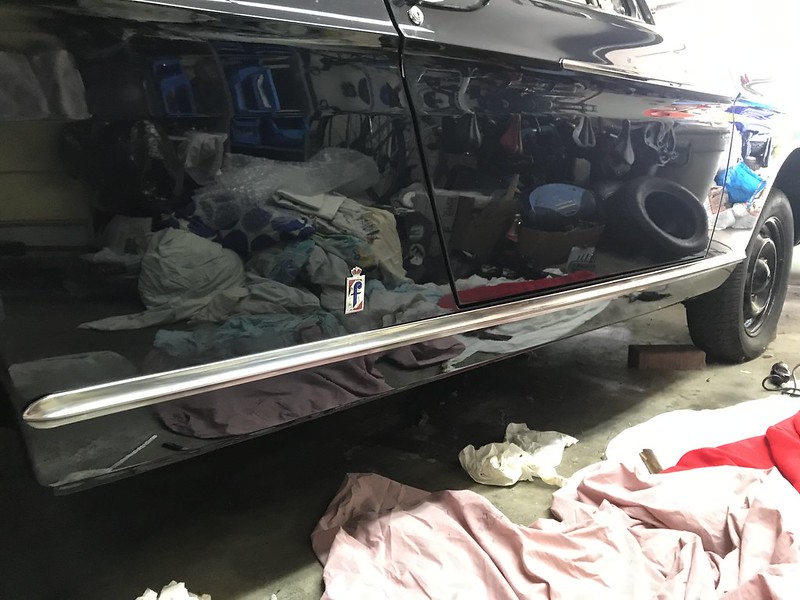
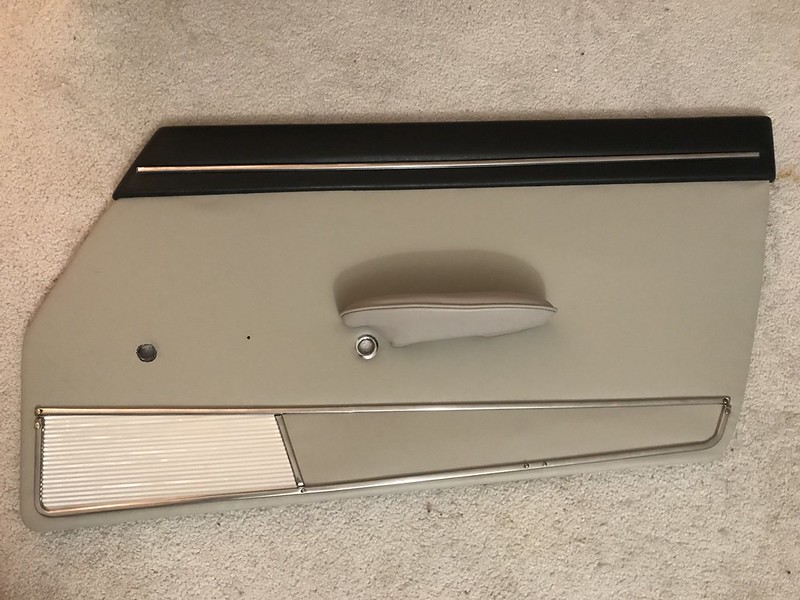
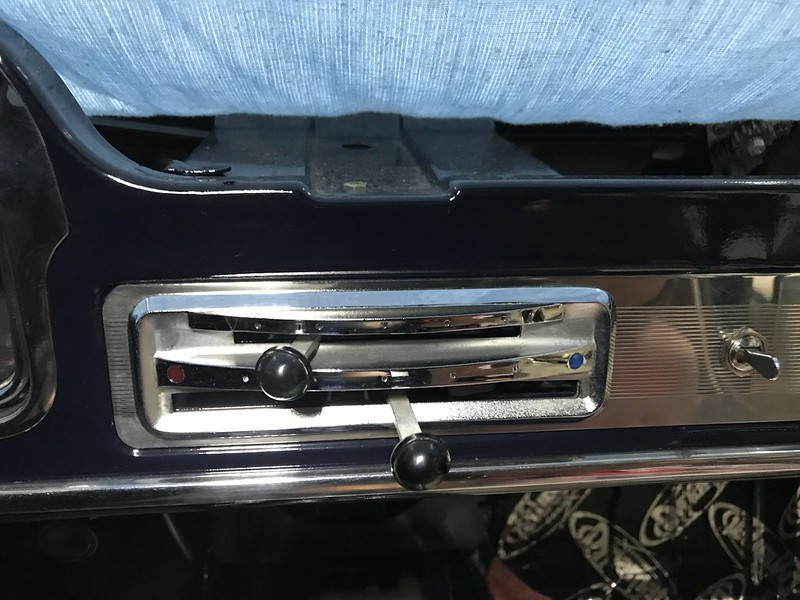
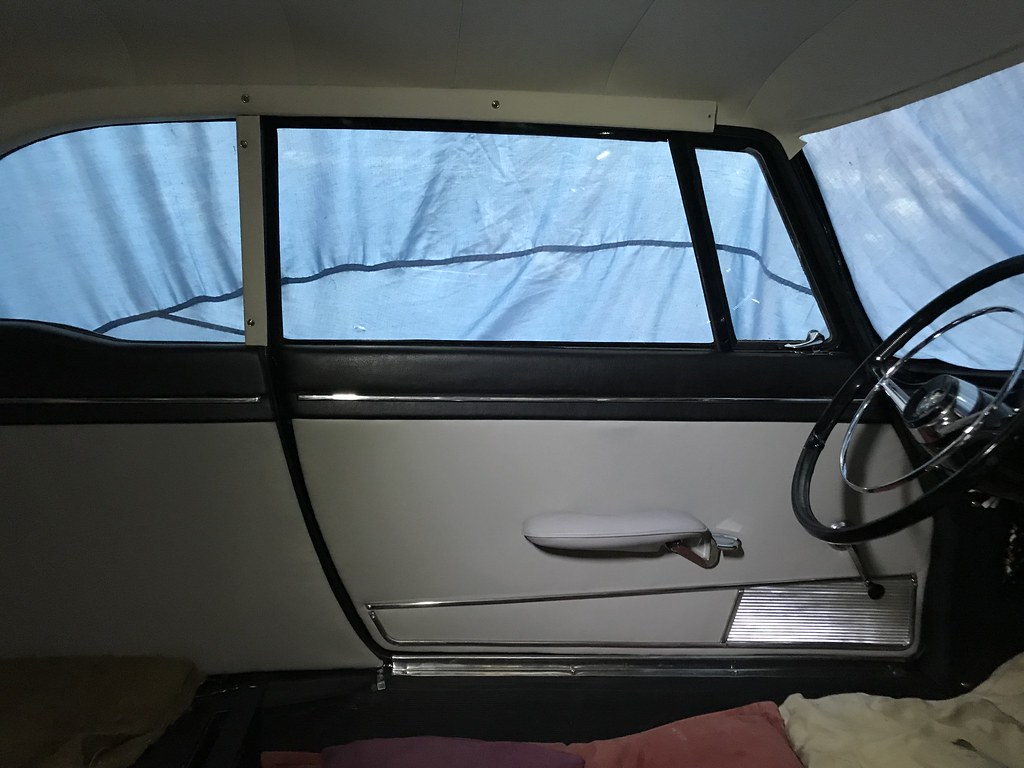
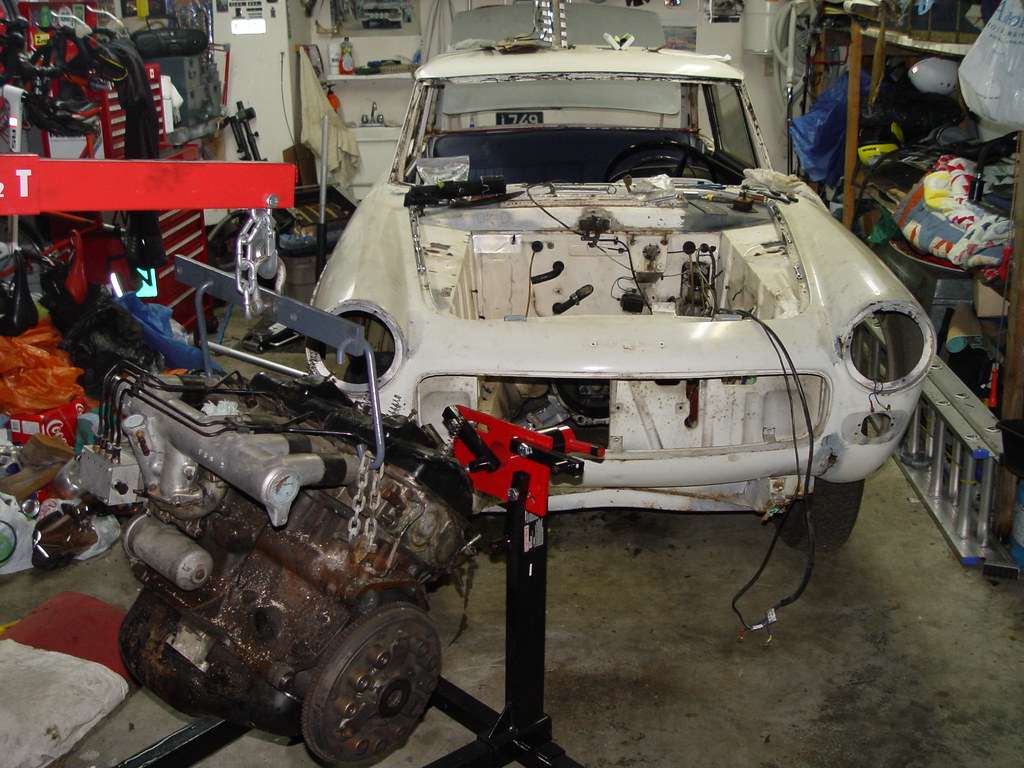
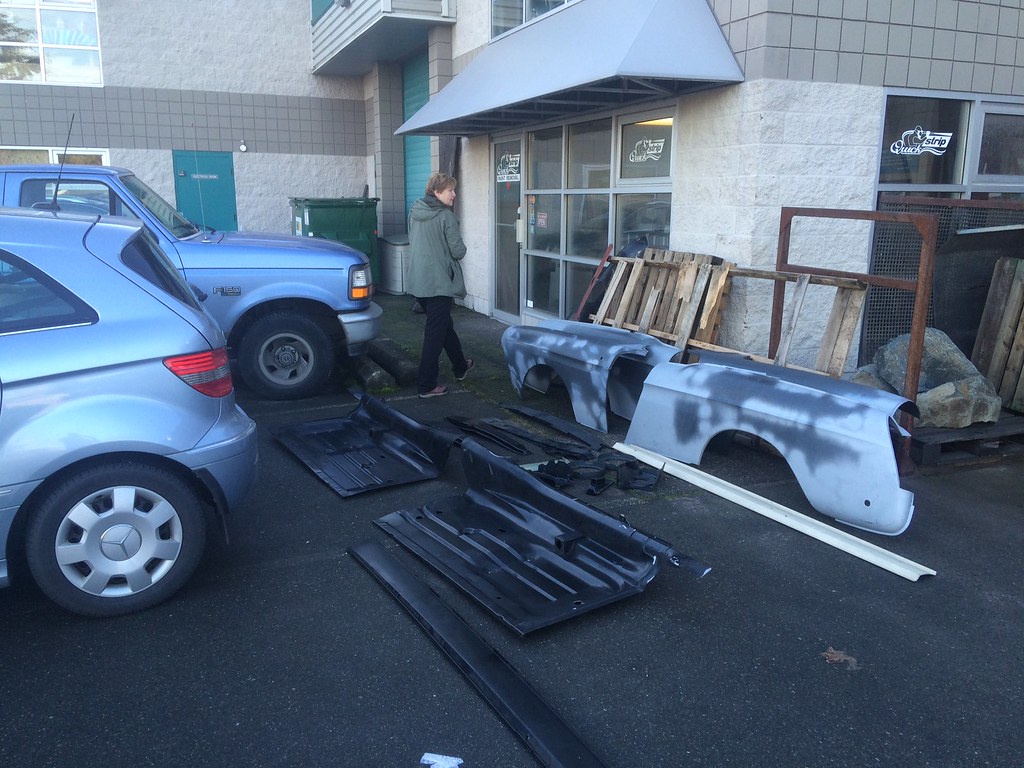
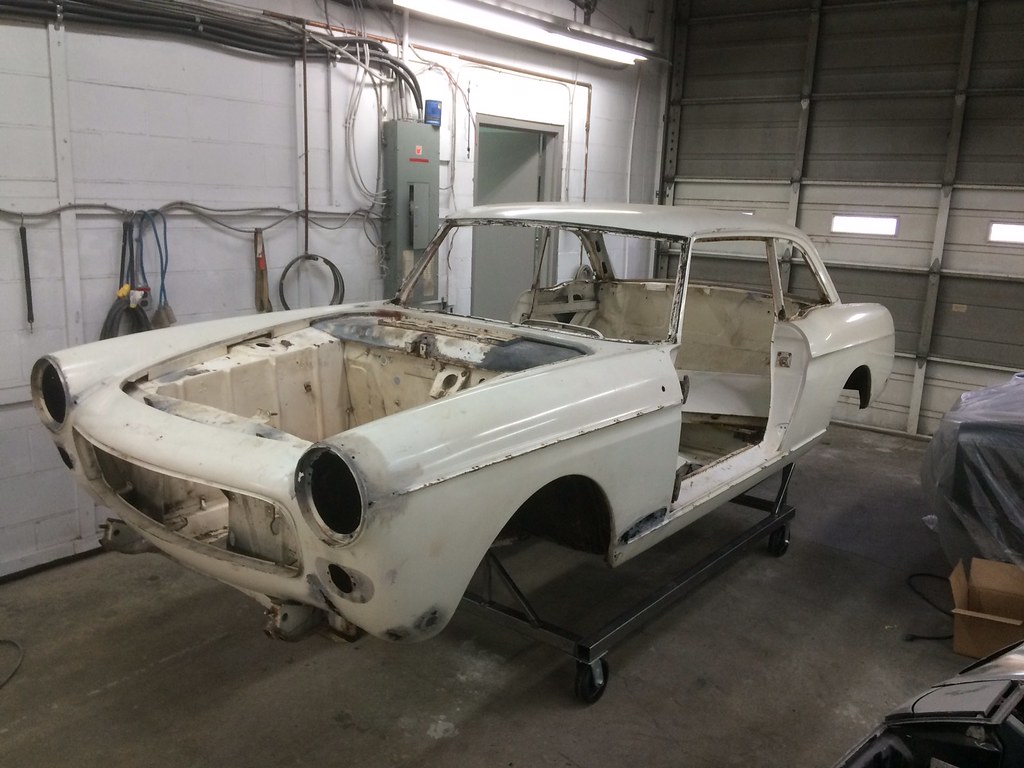
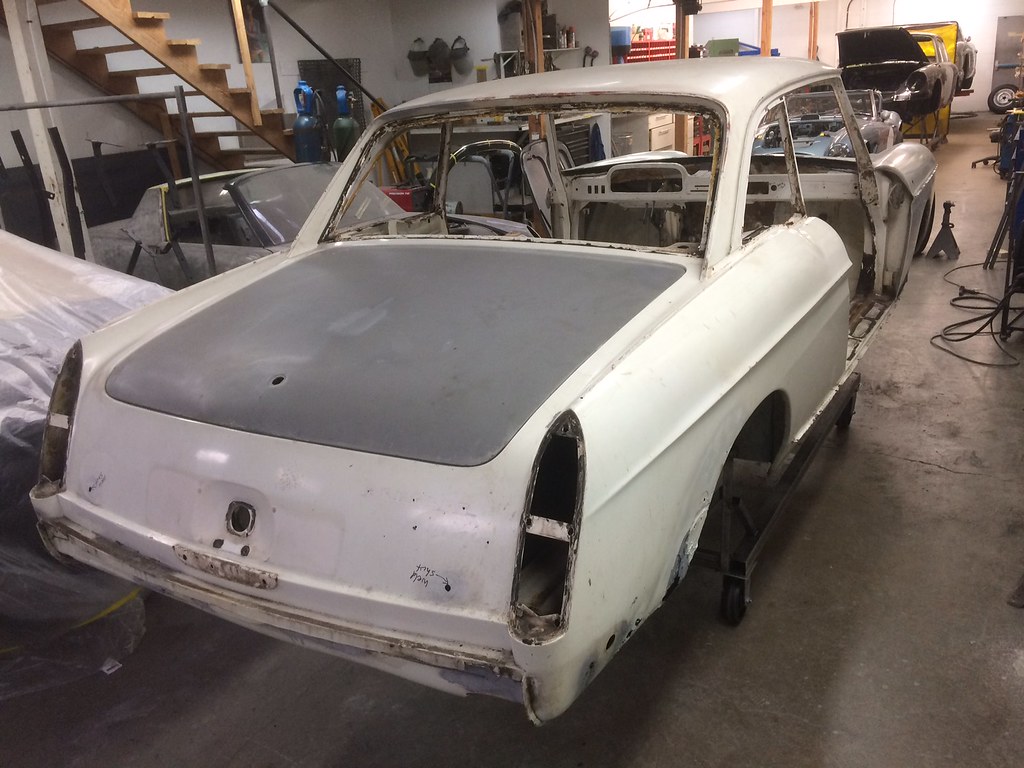
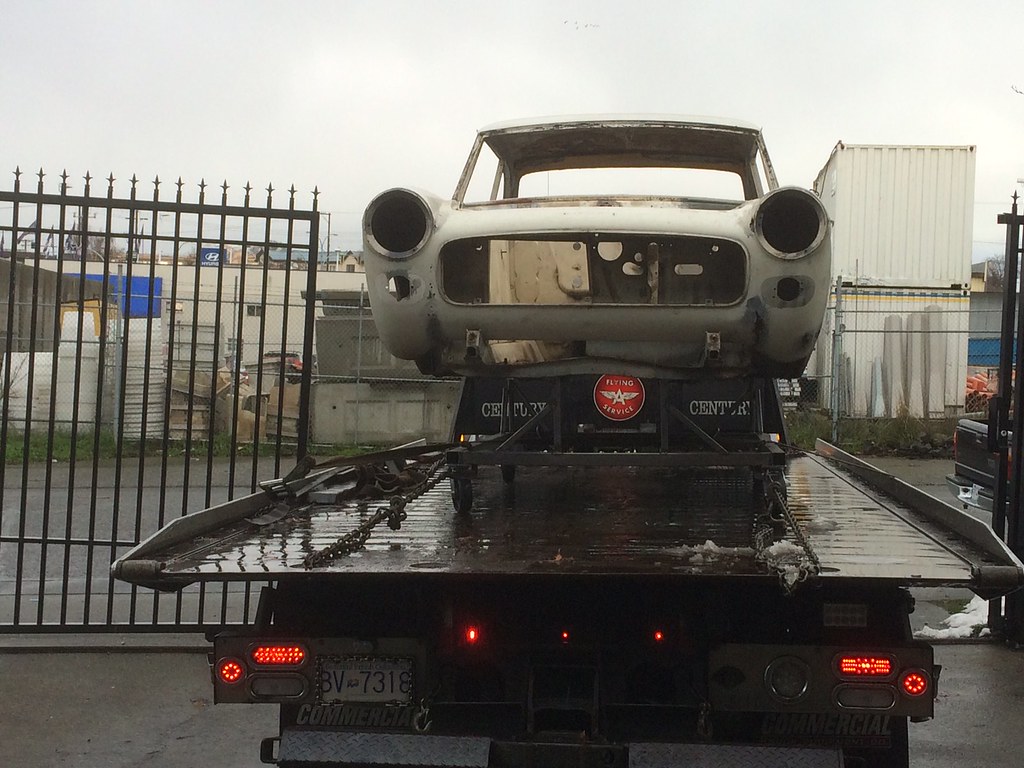
In 1966 my late Dad bought his first 404 in Montreal, a Canadian-assembled 404 Injection sedan in brown metallic with tan leather seats.  It was a great car, if rather rust-prone.  It ended up in the Netherlands, where he sold it in 1972.  Then, at age 12, I swore I'd get a 404 myself one day.  And so at age 20 I did, a 1967 404 Coupé Injection with a challenging amount of rust but the sweetest KF2 injected engine.  I had it until 1985 and then sold it due to the rust being crazy-bad, and bought a 1963 carbureted 404 sedan, which I converted to KF2 Injection.  That one was scrapped in 1990.  Meanwhile in February 1989, I bought a rusty but not _that_ bad 404 Coupé Injection.  It is this car that is being restored.


The last two weeks of November and the first days of December 2016, I took my 1966 404C apart at my home garage in anticipation of getting the restoration underway.  The restoration was done by Coachwerks in Victoria BC, a shop that does excellent work: Coachwerks | Classic Car Restoration in Victoria BC.  They are world-renowned restorers of Mercedes 300 SL cars.
 
Later in December 2016, the car was at the media blasting shop in Sidney BC, mounted on its cart.  I also had a lot of NOS 404C panels cleaned there too.  After the shell and NOS parts were returned to the restorer in Victoria BC, the restoration began.
 
30901166740_470a41628a_b.jpg
Note the KF2 (Kugelfischer) Injection engine on the stand in the photo
 
30942998670_478c8128eb_b.jpg
The NOS panels being dropped off at the blasting shop in Sidney
 

31563480995_a4e666fc42_b.jpg
The car is on its cart at Coachwerks December 10th 2016
 
31416926172_3c0dbfc17e_b.jpg
In good company: a P1800 under plastic, a 914/6, an Austin Healey 3000, a 911 and a 300 SL
 
30754337853_349732aed6_b.jpg
On the flatbed, taking a ride to the quick strip facility in Sidney BC, December 10th 2016

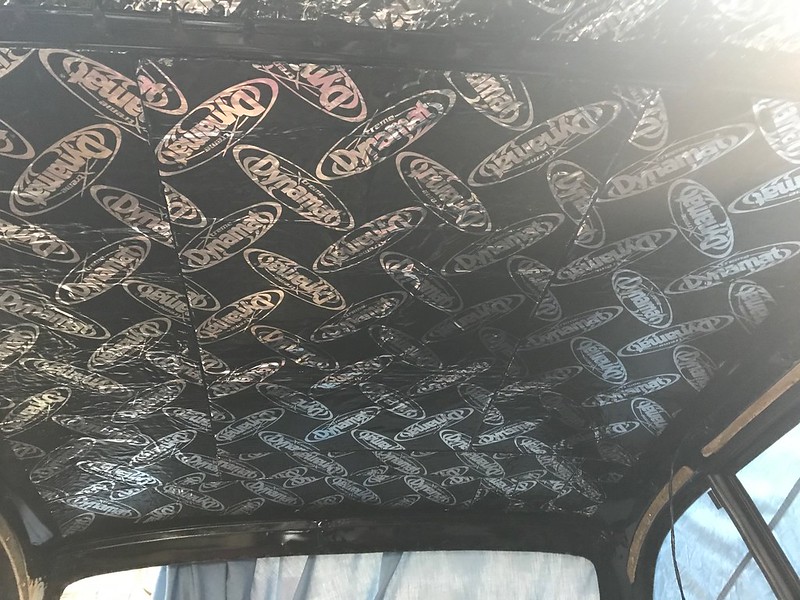
Edited by 404KF2, 26 February 2019 - 05:14.


Advertisement

#2 404KF2

404KF2
  • Member

  • 19,131 posts
  • Joined: October 99

Posted 24 February 2019 - 21:30

On January 6, 2017 I dropped a payment off at the shop and had a look.  Progress was restricted by the slowness of the stripper doing the replacement panels, specifically those for the the floor and chassis bits.  Once that was done, the work began, the first step being a cutting away of the floor elements.
 
31312430134_fe80b5cb26_b.jpg
NOS panels on the shop floor - the other half of the new floor is behind the photo field of view.
 
 
31312421044_ab36da28eb_b.jpg
Cut away floors
 
 
32115685076_b7805719dc_b.jpg
The original floors on their way to recycling!
 
 
31343603453_ce6c80c8b1_b.jpg
404C on its cart....300 SL behind.
 
I stopped by the shop on January 13 2017 to drop off a new front crossmember and rear jack mount I just got this week from Joern Haarmann in Germany, in case they were needed (yes they were).
 
32256695606_64906f2ba6_b.jpg
Left front floor partially reconstructed, rocker panel/sill on this side was being made in the shop because I only had one in NOS for the other side of the car.
 
32256730676_5280e1ed98_b.jpg
Front left detail of floor under reconstruction
 
31485314023_c4b8461aaa_b.jpg
The car seen from the front
 
32176449821_6f2f242940_b.jpg
Reconstruction of the left floor (work in progress) seen from inside the car.


#3 Zoe

Zoe
  • Member

  • 7,721 posts
  • Joined: July 99

Posted 24 February 2019 - 21:34

Wow!


#4 404KF2

404KF2
  • Member

  • 19,131 posts
  • Joined: October 99

Posted 24 February 2019 - 21:37

31963003910_76f528f2a3_b.jpg
Rear view
 
31620073443_b9fa45659d_b.jpg
When the bodywork was underway, I did the mechanical work myself at home.  Front suspension arms and Panhard rod mount are ready to go. All new hardware is available and new bushings are in as well.


The work as of the end of January 2017.  The floors and sills are complete, the rear fender/wing skins have been drilled off and the new ones readied, with work underneath in progress.  It was fantastic to see!
 
32441232541_054666d893_b.jpg
Since my spare fenders/wings were for a Cabriolet, they were separated at the peak of the fender/wing and the Cabriolet part was discarded. (That's a switch, usually Coupé parts are used for Cabriolets.)  Here, the new fender skin is clamped with Vise-Grips.
 
32563957765_5a23dcaede_b.jpg
View of the same thing from behind.
 
32410824702_6a70a009c3_b.jpg
Front view again, but now the fender skin has been unclamped and you can see some of the work they have been doing.
 
32522871346_412db0655b_b.jpg
Detail for left rear fender inner area.
 
31752006093_cb3184bce6_b.jpg
The new Peugeot floors I bought in 1988 (the last pair in Europe, I was told, who knows....) are now in the car.
 
32184749430_792c3d5ab7_b.jpg
View from below.


#5 404KF2

404KF2
  • Member

  • 19,131 posts
  • Joined: October 99

Posted 24 February 2019 - 21:54

46477725394_99401ba0d7_o.jpg


47149409902_b8288bd2a6_o.jpg

Before and after on the right rear jack mount.  Top tip: if buying any 404, insist on raising the car with the OE jack.  If the owner objects, the rear end looks like the "before" photo.


#6 404KF2

404KF2
  • Member

  • 19,131 posts
  • Joined: October 99

Posted 24 February 2019 - 22:06

These photos were taken Friday February 18, 2017.  Major front end surgery was underway!
 
Front fenders cut off!  Shock towers were cut out and rebuilt inside and out with new reinforcement plates from Peugeot.
32120355124_1b50711f38_b.jpg
 
 
Detail of cowl panel, not rusty at all inside.
32583009870_415d7b30f3_b.jpg
 
 
Inner fender panel was not in that bad of a condition, some repair was required near the bottom.
32583028680_ab1d67bb74_b.jpg
 
 
Dashboard with three rectangular holes gone and one round hole for the new - original type - wiper/washer switch!
32583050510_1ccb41891b_b.jpg
 
 
Taillights fit, good!
32149262743_945d91178c_b.jpg
 
 
Drilled out spot welds and removed outer McPherson strut tower skin.
32809840682_414ccf3d0d_b.jpg
 
 
Repair panels welded into the nose panel on both sides.
32583101790_b4bfd8590d_b.jpg
 
 
Interesting perspective!
32809868162_8da29cf85e_b.jpg


#7 404KF2

404KF2
  • Member

  • 19,131 posts
  • Joined: October 99

Posted 24 February 2019 - 22:11

I made a visit to Coachwerks on February 25, 2017:
 
32719715860_afcbeefc8e_b.jpg
 
32974936261_b9d1a1fc3b_b.jpg
 
33102032385_9d6d53d0b8_b.jpg
 
for detailed photos of the work done go here: Update 2
 

33192755386_99df5a9af9_c.jpg
 
March 4th 2017: new front crossmember mounted,.  Some significant repairs were needed on the driver's side inner fender and that fender is now tacked in place, with fine-tuning and possible future adjustments to follow. Next week I have to take the rubber seals down for panel alignment purposes, as well as the grille.
 
32390252184_5ccb204b07_c.jpg
 
32419618613_3cafbfc8e8_c.jpg
 
The old front crossmember didn't look all that bad but when it was off, the bodyman in the photo above showed it to me and shook it, and it sounded just like a Maraca :o


#8 404KF2

404KF2
  • Member

  • 19,131 posts
  • Joined: October 99

Posted 24 February 2019 - 22:14

March 24th, left front fender was welded on; other side was done the following week, and then some final welding and metal trimming was done before paint preparation begins.
 
33479810602_da85d09c16_b.jpg
 
33595553346_529f4feb9b_b.jpg
 
33595505096_377cf28bd7_b.jpg
 
March 31 2017: major welding is all done. Next step was a full coating in epoxy primer, then a few weeks of blocking and priming, followed by a topcoat in Dark Blue 1057. Exciting times!  Oh yeah that's me in photo 1, a bit older than the car ;)
 
33637063161_9397b3112b_b.jpg
 
32923195034_cbdb483d59_b.jpg
 
33766352335_b574371a22_b.jpg


#9 404KF2

404KF2
  • Member

  • 19,131 posts
  • Joined: October 99

Posted 24 February 2019 - 22:18

May 19, 2017, she was in "high-build" primer, with more preparation work to come.
 
34727300786_2bf2892741_c.jpg
 
34635200071_248c793bdb_c.jpg


#10 404KF2

404KF2
  • Member

  • 19,131 posts
  • Joined: October 99

Posted 24 February 2019 - 22:20

In late April 2017 I reassembled the struts, with new grease seals, new roller bearings for the steering swivels, new rubber boot and new upper cups.  That factory spring compressor is fantastic!  New Peugeot (NOS) dampers were installed.
 
33657816950_5506fa72c8_b.jpg
 
33657829460_84410ef39c_b.jpg


#11 404KF2

404KF2
  • Member

  • 19,131 posts
  • Joined: October 99

Posted 24 February 2019 - 22:22

In June 2017 I decided to have a look inside the lever end of the Italian-made Nardi floor shifter that my 404C had from new.  The last two I opened up had plastic bushings that had disintegrated over time and I thought that this one had a plastic bushing too, but intact, because the lever action was perfect.
 
After removing the 4 screws below the shifter, there was some very old, dirty oil in there.  This end of the shifter cannot get any lubrication from the gearbox proper even though it's attached to it.  The other two 404 Nardi shifters I had in the past were dry in there, with just some grease on the moving parts....
35065143356_559c0380b1_b.jpg
 
After removing two circlips, the mechanism comes apart.  I could have removed the lever but decided against it because the bolt inside the mechanism is tied shut with a wire and it seemed very serene - I could clean around the lever, with it still somewhat attached.....
34260800724_5b4b77edb7_b.jpg
 
The bushing in this version of the Nardi is definitely not plastic, it's bronze or brass!  It's in great condition!
34260798604_b05da8422e_b.jpg
 
View of the bronze bushing, which when the lever is actuated, moves up and down inside the sleeve attached to the shifter rod that transmits the action to the gearbox shifting forks.
34294956183_30f65a4979_b.jpg
 
The sump has been drained and cleaned out, and the bronze bushing is again circlipsed into place.
34260794644_20a425883a_b.jpg
 
The sealing faces and threading of the little sump were carefully cleaned and then sealed with Hylomar Blue, to prevent any oil leaks.
34260792484_bed7ab80ab_b.jpg
 
Sump screw on the Nardi, accessible from inside the car, 24 mm.
34294951973_2a17751972_b.jpg
 
...and refilled with Yacco vegetable based differential oil!


#12 404KF2

404KF2
  • Member

  • 19,131 posts
  • Joined: October 99

Posted 24 February 2019 - 22:22

Also in June 2017:


Harry Kalsbeek sent me a most appreciated gift - exact replicas of the Kalsbeek Motors dealer sticker that were on all cars they sold from their Ontario dealership in the sixties. This will again be worn with pride on the back of my 404 Coupé - delivered to its first owner in BC by Harry's parents themselves, all the way from the Greater Toronto Area - once the car is delivered back to me. He also sent some Castrol oil change door jamb stickers printed with the dealership name. 
 
35076995365_9a0645c15c_b.jpg


#13 404KF2

404KF2
  • Member

  • 19,131 posts
  • Joined: October 99

Posted 24 February 2019 - 22:25

July 2017:


35412530872_ea6f3e4f0e_c.jpg

4 road wheels were powder coated in black, and I got two new aluminium plates for the door jambs.
 
35541993766_808f5d7e28_c.jpg
The pedal assembly was rebuilt with new bushings for the brake pedal.
 
Now, you're probably thinking: "when - for criminy sake - will your 404 be painted?"  Well, I was asked to bring the grille surround back to the shop on Bastille Day to Coachwerks, as the bodyshell is virtually ready to paint.  A final fitting of the grill surround to the shell will confirm that it's ready.  Meanwhile, two of the three taillight bezels I have as well as the door handles are still at the chrome shop, as well as both bumpers, the latter for dent repair and polishing only.
 
You've read this before, but it's possible that the car will be painted in a week's time, and almost certainly by the end of July.
 
So, Peter Gallagher of Automotion, 1390 Pemberton Avenue North Vancouver, did the mounting and balancing when I was at his shop on Tuesday (11 July) morning.  When I arrived he was nearly done, but I managed to catch the last bit of work.  The wheels were "too pretty", Peter said, to hammer rim weights onto, so he used stick-on weights that will be invisible behind the large hubcaps. 
 
35831347551_b5c970837e_b.jpg
 
35922445936_3e498d218a_b.jpg
 
I think I will keep the two 30 year old Michelin MXL and two 28 year old XM+S 100 tires on rims, so when the car sits in the garage it can be on those tires, saving the XAS from flat-spotting during storage.


#14 404KF2

404KF2
  • Member

  • 19,131 posts
  • Joined: October 99

Posted 24 February 2019 - 22:27

September 29, 2017:


She came home to us:
 
36672945104_d93df2cfd9_b.jpg
 
23529985238_e42c6d15da_b.jpg
 
Front snow shield / spoiler
23777294728_1b4262ff2a_b.jpg
 
grille for hood air intake, front bumper filler panel
23777296468_2e7f698ba2_b.jpg
 
Carrosserie Peugeot tag
37371611810_1df5009d21_b.jpg
 
Plated parts (main batch) are back.  Bumpers are not plated but rather are stainless steel.  They are now straightened and polished beautifully.  Door handles are rechromed pot metal, and perfect.  Taillight bezels are also rechromed pot metal and although the plater was apologizing for their finish, it's very, very good - 9/10 - and excellent considering the bad starting condition.  The grille surround was rechromed too because the chrome on the upper lip was getting grainy.   All the silver-looking stuff is plated in cadmium as it was when it was new (silver, not the greenish version).
 
37586417780_28d2e250be_b.jpg
 
37795897646_9dd1e0a8bb_b.jpg
 
37795900806_8aef50baaf_b.jpg
 
37586423740_6f495e3c31_b.jpg


#15 404KF2

404KF2
  • Member

  • 19,131 posts
  • Joined: October 99

Posted 24 February 2019 - 22:28

Round two of plated hardware:
38163723992_857031155d_c.jpg
 
Replated taillights that I got a couple of weeks ago, this time  reassembled.  One of the turn signal bulb bases had to be replated due to corrosion and all of the lens screws were replated too. 
38163705592_11be01f381_c.jpg
 
6 months ago I was desperate to find one of these shock absorber cap nuts.  Instead I found an earlier version with the same threading that had to be turned down on a lathe to make it fit.  Then a couple weeks ago, I found this.....in the same box where I found the others.  So I had it replated for future considerations.....
38195727261_1d02a51d47_c.jpg
38195728931_bd6373bbfb_c.jpg


#16 404KF2

404KF2
  • Member

  • 19,131 posts
  • Joined: October 99

Posted 24 February 2019 - 22:32

November 2017....
 
Dashboard's Pininfarina sign has been replated - the 404C models were built in Italy:
37795174394_fbfd5ec2dc_c.jpg
 
....and mounted on the dashboard's stainless steel trim panel.  Note the stainless trim to the left of the instrument cluster, it's not original but I like it.
37796067754_b144367e2b_c.jpg
 
Water pump pulleys.  The one with red insulation is the one I propose to use, because it's in better condition than the original with the cracked insulation.  I painted both anyway.  The old one still works fine. 37795188234_3b4641e985_c.jpg
 
February 2018:
39247066864_717a757d70_b.jpg
New sending unit mounted (I found the screws!) into refurbished and coated fuel tank, and of course I put new o-rings on the three screws that secure the unit to the tank
 
26338888848_81438af1bd_b.jpg
Front bumper mounted, slight adjustments required
 
40178779882_9ec3cabedc_b.jpg
Under bumper spoiler that was fitted to 1962-1966 404C models
 
26363168828_1e585a6c78_b.jpg
Rear bumper mounted, license plate light, fuel filler, plus I improved the hood release cable, mounted the battery buffers and found the missing hardware for the windshield washers
Wiring harness reinstallation. The bit that pops through the rear bulkhead into the trunk was worrying me because it was a bear to remove but it slid back into place beautifully. You can barely see here the flat black concealing plate that the wiring harness goes through to get to the front. The fuse box has been clipped back into place below the A-pillar. Next step is to get the front of the harness installed. That should be somewhat more complicated!
 
26760105359_15d5a85c94_c.jpg
 
I also got new remanufactured bumper irons (for the side front bumper mounts) for my Coupé, made by Richard Gretau in Bordeaux:
 
38575659811_704a065029_c.jpg


#17 404KF2

404KF2
  • Member

  • 19,131 posts
  • Joined: October 99

Posted 24 February 2019 - 22:34

March 2018: the steering shaft was removed from the column for a thorough cleaning and lubrication.  Between the shaft and the column in the photo, you can see the upper rubber coated bronze bushing that provides location for the shaft.  All parts are in great condition so after a coating of thick grease, it's all back together.  
 
26735427308_f97104e6ef_b.jpg
 
The third batch of cadmium plating has been done, and about half of the stainless steel trim polished:
 
40739403421_d8f5d88870_b.jpg
 
 
I snapped the window frame SS trim back on both doors, and provisionally put the beltline trim on as well.  The rear quarter window trims will be next. 
 
26868170498_446e2fbb99_b.jpg


#18 404KF2

404KF2
  • Member

  • 19,131 posts
  • Joined: October 99

Posted 24 February 2019 - 22:38

April 2018:
 
27532090878_4f217e9781_b.jpg
 
Fourth batch of plating, including engine hood latch, support mount for SEV wiper motor, three of the four decent used front suspension bolts (spare, but with better plating than the new Peugeot-supplied ones I have installed), and of course the 10 rear side window trim clips.
 
September 2018:
 
29769103237_0c57704d04_c.jpg
 
43797069525_bab81a63d8_c.jpg
 
I was dreading reinstalling the driver's side window winder cables and reseating them properly.  It went reasonably well.  As did the installation of the window tracking.  The nightmare was installing the interior door opener - getting the clip on to the door latch, blind and inside the door was "fun".  I also installed the door lock.  Installing the glass is a pain too.  Ugh, glad it's over.
 
43738202194_8227e080d6_b.jpg
 
29517862657_f11852d9be_b.jpg


#19 404KF2

404KF2
  • Member

  • 19,131 posts
  • Joined: October 99

Posted 24 February 2019 - 22:42

October 2018:


I got the beltline trim installed on the driver's side.
 
With some help: my youngest daughter put the nut that holds the rearward part of the front fender trim on - that is only accessible with the front door opened about 45 degrees, because even like that, there is about 3 mm of space to play with to get the sucker spinning on the captive bolt that's attached to the stainless steel trim. All other connections are easy.  My other daughter did the passenger side a couple of months ago. My fingers are too big to get in there properly!
 
43355551590_1da1c37143_b.jpg
 
31295962728_b742684e3c_b.jpg
 
December 2018:
 
46138966111_b6e906c67a_b.jpg
Clearcoat on the Carrosserie Peugeot plate.
 
 
45227665645_e4d9ae2b10_b.jpg
For reassembly, I used the original insulation as a template to cut Dynamat Xtreme panels, mounted the Dynamat and then glued the original insulation to it.
 
45415199564_0a499b6f4c_b.jpg
Heater core with the ancestor of modern "set and forget" heat level - thermostatically controlled water valve.
 
46138965281_7ec58c019d_b.jpg
Heater core box is mounted in the car with new foam to seal between the air intake in the bodyshell and the bakelite box.
 
44322354040_55f168714c_b.jpg
Wiper mechanism mounted - both spindle assemblies are brand new.
 
And a project for after the car's back on the road:
 
45236771955_a2e4f78949_b.jpg
 
Together at last: 6 Jaeger France gauges in MPH and degrees F ( but the oil pressure is in bar - luckily I am bilingual ;) ) plus the 5 original warning lights that make up part of the sports instrument panel for the 404 Coupé and Cabriolet.
 
Now I have to get two or three of these gauges refurbished and have a metal plate to hold them made up.


Advertisement

#20 404KF2

404KF2
  • Member

  • 19,131 posts
  • Joined: October 99

Posted 24 February 2019 - 22:45

January 2019:
 
31597716287_a99c57da05_c.jpg
 
When the 404C goes back on the road, it will be with this - its original instrument panel.  I tidied it up yesterday - took it apart, cleaned it, repainted the fuel tank and temperature gauge needles.  The car was sold when new in Canada, hence the MPH speedometer.  The 120 MPH scale was particular to the Injection version.  The car came with an alternator so the "battery" gauge is a thermal voltmeter.
 
The sports instrument panel I have the equipment for will go in once the car has been on the road for a while.
 
New rubber parts for the wiper motor:
46977718171_edb3e88d30_b.jpg
 
Instrument panel connected - the wiring as built in my car is very different than the wiring diagram:
32036508607_6f1064c9c2_b.jpg
 
The instrument panel installed.  Ventilator switch is now mounted on the dashboard rather than the SOFICA heater box:
46063887575_f646247c0b_c.jpg
 
February 2019: The Dynamat installation is done. Onto the electric washer pump (mounted under the dashboard) next and then the steering column + pedal box will be installed.
 
33254729668_0378d0aa44_c.jpg
 
32188083687_439f450d4d_c.jpg


#21 barrykm

barrykm
  • Member

  • 808 posts
  • Joined: February 02

Posted 25 February 2019 - 03:48

My word, that is fantastic!  :clap:


#22 Ray Bell

Ray Bell
  • Member

  • 80,259 posts
  • Joined: December 99

Posted 25 February 2019 - 04:10

Fastidious... and long-awaited...

I'm still looking forward to going for a ride in it some time.

#23 kikiturbo2

kikiturbo2
  • Member

  • 869 posts
  • Joined: December 04

Posted 25 February 2019 - 05:10

Fabulous car. Shot one a couple years ago..


63.jpg


64.jpg


62.jpg


#24 Zoe

Zoe
  • Member

  • 7,721 posts
  • Joined: July 99

Posted 25 February 2019 - 06:20

Even more wow! And Kiki's picture is awesome as well!


I wonder where you get all those little parts like bushings etc? I'm having trouble of getting some of the stuff for my '83 Supra (plastic bushing for the gear shifter for example) and a Peugeot from your vintage is certainly not easier to find spares for I guess. Are you having a lot remanufactured?


#25 Ray Bell

Ray Bell
  • Member

  • 80,259 posts
  • Joined: December 99

Posted 25 February 2019 - 10:50

Lots of the 404 stuff is shared with the sedans and wagons, I'm sure...

I do mean apart from body and trim. And with these cars having been built over such a long period there are spare parts supplies that have been put in place to keep them running.

Aftermarket stuff, too.

Great shots there, Kiki, but you're now in big danger. Mike will want to know the VIN, owner's name and e.mail address.

#26 kikiturbo2

kikiturbo2
  • Member

  • 869 posts
  • Joined: December 04

Posted 25 February 2019 - 11:54

Great shots there, Kiki, but you're now in big danger. Mike will want to know the VIN, owner's name and e.mail address.


ha, we migh be able to help.. :D


Interesting thing was that the owner used the car on a relatively regular bassis... and it shared the garage with some other nice coupes like Ferrari 330 and 612... Peugeot being a favoured choice due to its comfort... It is a lovely car.


#27 Charlieman

Charlieman
  • Member

  • 2,545 posts
  • Joined: October 09

Posted 25 February 2019 - 12:07

It is interesting to see that "drill and fill" welds have been used for some structural body members. In the UK, this was deprecated for body repairs for several years. Replacement sill and floor panels, originally spot welded, were required to be continuously welded -- whether or not it was necessary or appropriate.


#28 Zoe

Zoe
  • Member

  • 7,721 posts
  • Joined: July 99

Posted 25 February 2019 - 12:49

Interesting indeed. Here (Germany) a continuous weld is not allowed.


#29 404KF2

404KF2
  • Member

  • 19,131 posts
  • Joined: October 99

Posted 25 February 2019 - 15:40

ha, we migh be able to help.. :D


Interesting thing was that the owner used the car on a relatively regular bassis... and it shared the garage with some other nice coupes like Ferrari 330 and 612... Peugeot being a favoured choice due to its comfort... It is a lovely car.

Oh yes, I would love to get the VIN of that blue car in Zagreb!  Great photos!


#30 404KF2

404KF2
  • Member

  • 19,131 posts
  • Joined: October 99

Posted 25 February 2019 - 15:41

Even more wow! And Kiki's picture is awesome as well!


I wonder where you get all those little parts like bushings etc? I'm having trouble of getting some of the stuff for my '83 Supra (plastic bushing for the gear shifter for example) and a Peugeot from your vintage is certainly not easier to find spares for I guess. Are you having a lot remanufactured?

There are lots of NOS sources and Peugeot themselves is manufacturing a range of "Classic" parts now, so the mechanical stuff is easy to source.  The body panels took me decades to amass.


#31 404KF2

404KF2
  • Member

  • 19,131 posts
  • Joined: October 99

Posted 28 February 2019 - 06:01

Last bit of work done at Victoria Plating Ltd: 
 
The 4 holes that a previous owner had punched into the sill/rocker panel embellishment strips when the captive bolts rusted off decades ago were welded shut and the outside was polished so this patching work became invisible; the two upper rear fender trims were de-dented and then polished; cadmium plating on the headliner trim panels which are covered with soft headliner material.  This was done because they could rust as the originals did and that distorts the fabric as the iron oxide builds up; and finally the hardware for the handbrake components under the car were replated in yellow cadmium.
 
47182455962_33bbd626d3_b.jpg
32292465577_75eb4a098d_b.jpg
47182454172_d34e1cb967_c.jpg


#32 404KF2

404KF2
  • Member

  • 19,131 posts
  • Joined: October 99

Posted 03 March 2019 - 02:44

I dropped off the 404C seats and headliner parts at Rightway Heritage Trimming in Highlands near Victoria early this afternoon. The seats will be done in light grey natural grain leather, tanned by the company Hyde. This is not the embossed stuff with fake grain like a plastic dashboard, but just dyed-through cowskin. We may have seat heater elements added at the same time to eventually connect with an upgraded alternator. Photos? When they're done, probably in June or so.


#33 404KF2

404KF2
  • Member

  • 19,131 posts
  • Joined: October 99

Posted 14 March 2019 - 04:31

46651144934_337b22be9a_c.jpg
 
I bought a different set of rubber isolators for the wiper motor and drive, because it's in a colour that more closely matches the latex rubber original.  The pale red ones in the photo will be used in the 404C and the others will be spare parts.  All the red ones are in what seems to be silicone rubber so should handily outlive the originals.


#34 404KF2

404KF2
  • Member

  • 19,131 posts
  • Joined: October 99

Posted 01 April 2019 - 02:08

The handbrake cable and control were assembled and mounted today, along with the pedal box.  
 
The worst part of the whole operation was discovering that the buttress under the driver's side, which is a Peugeot original, has a captive stud that is about 6 mm too short to hold the metal handbrake sheath under the driver's floor. So I had to remove the brass clamp and reduce its thickness by about 3 mm on both sides using a Dremel and files (good old engineering on this part, with massive redundancy) in order to get it on.
 
The pedal box was dead easy of course and the stuff under the car was as well.
 
32569095707_4c68bb23f6_c.jpg
 
47458532592_ac8dcc8e98_c.jpg
 
46787471004_5b86d1cb14_c.jpg


#35 raceannouncer2003

raceannouncer2003
  • Member

  • 2,944 posts
  • Joined: March 05

Posted 01 April 2019 - 05:48

A friend took these photos are the Euro Cars and Coffee at the Oak Bay Marina March 24.  Is that your car ?


https://public.fotki.../007.html#media


https://public.fotki.../008.html#media


Vince H.


#36 404KF2

404KF2
  • Member

  • 19,131 posts
  • Joined: October 99

Posted 01 April 2019 - 14:32

No, that is my friend Tim's car.  He lives in Oak Bay.  I live in close to  Nanaimo.  Mine's a little bit darker blue and is not yet assembled.  Tim's 404C was restored in about 1995 and he is rebuilding the original engine now.  It needs some work these days but presents well.


#37 Ray Bell

Ray Bell
  • Member

  • 80,259 posts
  • Joined: December 99

Posted 01 April 2019 - 21:15

Has the wagon worm drive been removed yet?


#38 404KF2

404KF2
  • Member

  • 19,131 posts
  • Joined: October 99

Posted 03 April 2019 - 04:19

Good question.  I suspect not.  Tim has not been doing much to it recently.


#39 404KF2

404KF2
  • Member

  • 19,131 posts
  • Joined: October 99

Posted 06 April 2019 - 01:36

The front seats have been reupholstered by Geoff Chrysler.  Very nice: natural grain dyed through light grey "Hyde" brand leather, with heating elements (I'll need a better alternator than it came with to power that!).  Parts of the headliner (also redone by Geoff) are visible in the foreground.  His next task is redoing the rear bench, which has a fold-down armrest.  I may get the parts in the photo this coming Monday.
 
46822189984_fc21dbd78e_c.jpg


Advertisement

#40 TennisUK

TennisUK
  • Member

  • 21,485 posts
  • Joined: March 06

Posted 06 April 2019 - 07:59

Loved reading this thread thanks 404kf2!

#41 Ray Bell

Ray Bell
  • Member

  • 80,259 posts
  • Joined: December 99

Posted 17 April 2019 - 12:25

I guess it will go into hibernation for a while...

Seeing as Mike's heading overseas for a month soon.

Then again, he might snap some pics of others he sees while he's away.

#42 404KF2

404KF2
  • Member

  • 19,131 posts
  • Joined: October 99

Posted 28 April 2019 - 05:56

My Kugelfischer KF2 injection pumps - the one from the car is second from left.
47719227681_9265872e0a_c.jpg
 
The stainless steel trims from front and rear windscreens as well as the back of the roof buttresses.
33842201878_65e5d6cde6_c.jpg
 
Rear bench seat in light grey leather.
40752894123_19c9680335_c.jpg


#43 Ray Bell

Ray Bell
  • Member

  • 80,259 posts
  • Joined: December 99

Posted 28 April 2019 - 11:16

Keep 'em coming, Mike...

So much attention to detail, you might be allowed to enter car shows with that one day.

#44 404KF2

404KF2
  • Member

  • 19,131 posts
  • Joined: October 99

Posted 24 January 2020 - 01:43

April 2019 through January 2020 update:
 
I whipped the Kugelfischer injection pump and head off before our trip to Britain in May 2019 for calibration and new seals, and the head seems good with no fine cracks between valve seats, although I have a new one to use. The liners have a nearly undetectable lip at the top so could be reused, but won't be, because I have new ones.
 
46757438845_6c7541085a_b.jpg
47620427152_0f8a40cec4_b.jpg
 
The stainless steel trims are now mounted on the replica inner door and rear seat area upper side panels...
48391618746_52b62b8ab7_c.jpg
 
right quarter window installed:
48391629261_5e6c8ba749_c.jpg
 
and the left one:
48391770107_1f647b8541_c.jpg
 
48400542787_fe5bd6aff4_c.jpg
 
I had to drill two new holes in my brand new rear fender to mount the stainless steel trim at the peak of the rear fender.  Stressful! I broke a small drill bit but didn't damage any visible part of the fender. So it worked well and now only the left side remains to be done.


The left rear fender peak trim is also on and now the rear roof trim as well. The clips that hold the trim on have teeth that bite into the body seam so all were treated with a thick goop of Waxoyl before installing, to protect the metal.
 
48572597787_69e76fcb09_b.jpg
 
48662342051_5337bf5a83_c.jpg
I mounted the sill trims (stainless steel) yesterday.
 
48661969023_4fc0cb6ca7_c.jpg
And today I retrimmed the driver's door panel in vinyl to match the seats.  It turned out well, despite me being an amateur.
 
Next: the passenger side....


The other side's done.  The little black dot marks a puncture where the fixing screw for the passenger grab handle will go.  This side had more "home repairs" done on it by previous owners, with no fewer than seven holes in the stainless steel trim.  The 4 at the extreme ends of the long pieces will have screws in them, but the other three have been blocked off by gluing a small screw head into each (the shanks were cut off).  Tomorrow I will aim to do the last quarter panel in vinyl and that should only take about an hour or less.  These door panels were very time-consuming, 7 hours each.
48696787163_6f02f34b3b_c.jpg


#45 404KF2

404KF2
  • Member

  • 19,131 posts
  • Joined: October 99

Posted 24 January 2020 - 02:14

September 2019-January 2020 update, continued....
 
Original Italian rubber mats glued in on the passenger side. 53 years old and still in good shape.
 
48735208022_41a1e07c66_h.jpg
 
48905961023_6441acfc62_c.jpg
Heater controls mounted - all silver cadmium plated
 
48906685842_36ff66930d_c.jpg
Both rear quarter panel trims were mounted.
 
48906606002_28581153d0_c.jpg
New headliner mounted. Front part is not mounted because the windshield has to go in first. That's one of the next tasks: front and rear windshields.
 
48960749452_10fea17978_c.jpg
 
New carpets custom made for the 404C by Geoff Chrysler in Highlands BC. Wilton wool.
 
Seat slides (NOS) hand painted in Krylon semi-gloss after tidying up.
48966066507_5700277e7e_c.jpg
 
Upper door replica panel for a Cabriolet modified by me to fit the Coupé and it worked reasonably well.  The shape difference is quite remarkable and quite a bit of work was needed.
48965340168_9d50e3dfe7_c.jpg
 
The panel completely installed, taken from inside the car with the door closed.
48965341318_e066b6f806_c.jpg
 
Driver's side:
49432466477_5a0ee021f4_b.jpg
 
I used this new S.U.R.&R. PFT409 brake flaring tool.....
49113372787_a4eee4d250_b.jpg
 
....to make my first ever brake line:
49113372362_1fc1590043_b.jpg
 
And wow is that tool ever amazing!  Perfect DIN bubble flare every time.  The pistol grip tool is hydraulic.  Expensive but worth it if only for the knowledge that I can't mess up.
 
This line is the one that connects the two front Thermostable brake cylinders.
 
I cut the inner rear fender protectant and trunk floor insulation, mounted it, put the rubber mat in and clipped it into place with the 4 large modern plastic clips (better than the rubber originals and easier to use!). Photo of the work completed:
49432225731_78da0f1ee6_b.jpg
 
Last week I finished the brake line fabrication and also made and installed the fuel lines, brake lines and hoses.
49431765013_741418fe13_b.jpg
 
Then I had about 4 hours to get some things done, so   Then I mounted the front fuel line retainer that holds the two fuel lines at the front end of the car, mounted the cage nuts on the road wheels and finally glued the seal to the fresh air intake.
 
Another day I put the steering column together.  Note the cover on the aperture that normally houses the column-mounted gear shift lever.  My 404C has a Nardi floor shifter.

49431764323_2c85fef308_b.jpg


Front bumper side mounts added.  The cage nuts inside the bumper were missing so getting the bolt threaded was a bit of fun but not impossible!

49431765063_c5c9c0ea97_b.jpg


Stainless steel exhaust mounted, including Peugeot OE heat shield:

49432240781_9d2c344538_b.jpg


Sill plates installed:

49432240731_473ea520d1_b.jpg


Laminated windscreen is in:

49431765953_4872df8b2e_b.jpg


#46 Ray Bell

Ray Bell
  • Member

  • 80,259 posts
  • Joined: December 99

Posted 24 January 2020 - 03:12

How did you finish up with the rear window, Mike?


Did you get it to go in with the trim attached?


Great work, I can't wait to see the finished car...


#47 404KF2

404KF2
  • Member

  • 19,131 posts
  • Joined: October 99

Posted 24 January 2020 - 03:50

The rear window is still not resolved. I have to pop it out and try again. I'm going to use another 10+ clips this time, more than it had when new ....but it can't hurt. A bit more finesse when installing is needed.

The windshield seemed as though it'd be easier because it has no clips but rather the retaining element is part of the stainless steel trim piece itself. And it was. Now I can finish the headliner, sun visors, rearview mirror and dash pads.

#48 Lee Nicolle

Lee Nicolle
  • Member

  • 11,069 posts
  • Joined: July 08

Posted 24 January 2020 - 04:38

The rear window is still not resolved. I have to pop it out and try again. I'm going to use another 10+ clips this time, more than it had when new ....but it can't hurt. A bit more finesse when installing is needed.

The windshield seemed as though it'd be easier because it has no clips but rather the retaining element is part of the stainless steel trim piece itself. And it was. Now I can finish the headliner, sun visors, rearview mirror and dash pads.

Get an expert to pull the glass in. Will save the headaches and not damage the mouldings and or glass.

#49 404KF2

404KF2
  • Member

  • 19,131 posts
  • Joined: October 99

Posted 24 January 2020 - 04:42

I can do it.  Trim is stainless steel and extremely tough.


The windscreen was easy.  When I asked a local shop they said "we'd do it but if the glass cracks, it's at your own risk".  So, I'll try once more on the rear before paying someone else.  I'm also wondering if they'd do it at a flat rate.  On the hour could be witheringly expensive and they could shred the headliner at the back where the rubber gasket overlaps it.


#50 404KF2

404KF2
  • Member

  • 19,131 posts
  • Joined: October 99

Posted 26 February 2020 - 05:44


49412841087_0701bbf981_b.jpg
 
Windshield is in.  It's a laminated screen as all cars sold in Canada and the USA have had to be equipped with since the 1950s.  The brand of the screen is F&F, and it's called "Safety Plate" on the tiny etching.  Locally made in the sixties or seventies, which is amazing as so few Coupés were sold in Canada (none in USA) and the shape is different than the Cabriolet. There is a safety test decal on the screen from January 1973 so I expect the original broke between 1967 and 1972.
 
 
New Peugeot NOS upper heater hose added. Wiper switch wired up and dashboard pad added.
 
IMG-5909.jpg
IMG-5908.jpg
 

Injectors-tested.jpg
 
Today I got my 18 cleaned and tested injectors back from Nottingham Diesel Services Ltd.
 
The 6 NOS:
2 x DL0 20D - release at 37 bar, good jet, no drips
3 x DL0 20D - release at 35 bar, good jet, no drips
1 x DL0 20B - release at 33 bar, good jet, no drips
 
The 4 originals from my car's engine:
1 x DL0 20B - release at 29 bar, good jet, no drips
3 x DL0 20B - release at 27 bar, good jet, no drips
 
Random spare injectors:
3 x DL0 20B - release at 30-32 bar, good jet, small drip but OK
3 x DL0 20B - release at 22-25 bar, jet OK, but drips under residual pressure that could make cold and warm starting a problem.
 
2 x DL0 20B - defective
 
I'm going to use 4 x NOS injectors (DL0 20D).